Studio Ghibli Crochet |
Hello, fellow crocheters and Studio Ghibli fans! 🌸 If you’re enchanted by the magical world of Spirited Away, you’re in for a treat. In this tutorial, we’re bringing two iconic characters—Kaonashi (No-Face) and the adorable Susuwatari (Soot Sprites)—to life in the form of cozy granny squares.
Whether you’re a crochet newbie or have plenty of projects under your belt, these Studio Ghibli Crochet granny squares are perfect for adding a touch of whimsy to any blanket, scarf, or bag. So, grab your hook, gather some yarn, and let’s dive into a world where our favorite characters become soft, handmade treasures. Happy crocheting! 🌌🧶
Supplies
In this Studio Ghibli Crochet Project, you are going to need:
- Yarn (I used Milk Cotton yarn in black, white, lilac, yellow, and blue)
- Hook ( I used 2.5 mm)
- Scissors
- Tapestry needle (optional)
If you are a beginner, here is a tutorial on Basic crochet stitches
Step 1: Susuwatari | Base
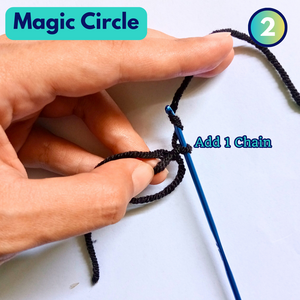
Magic Circle
Magic Circle

You already have one chain but make 1 more.
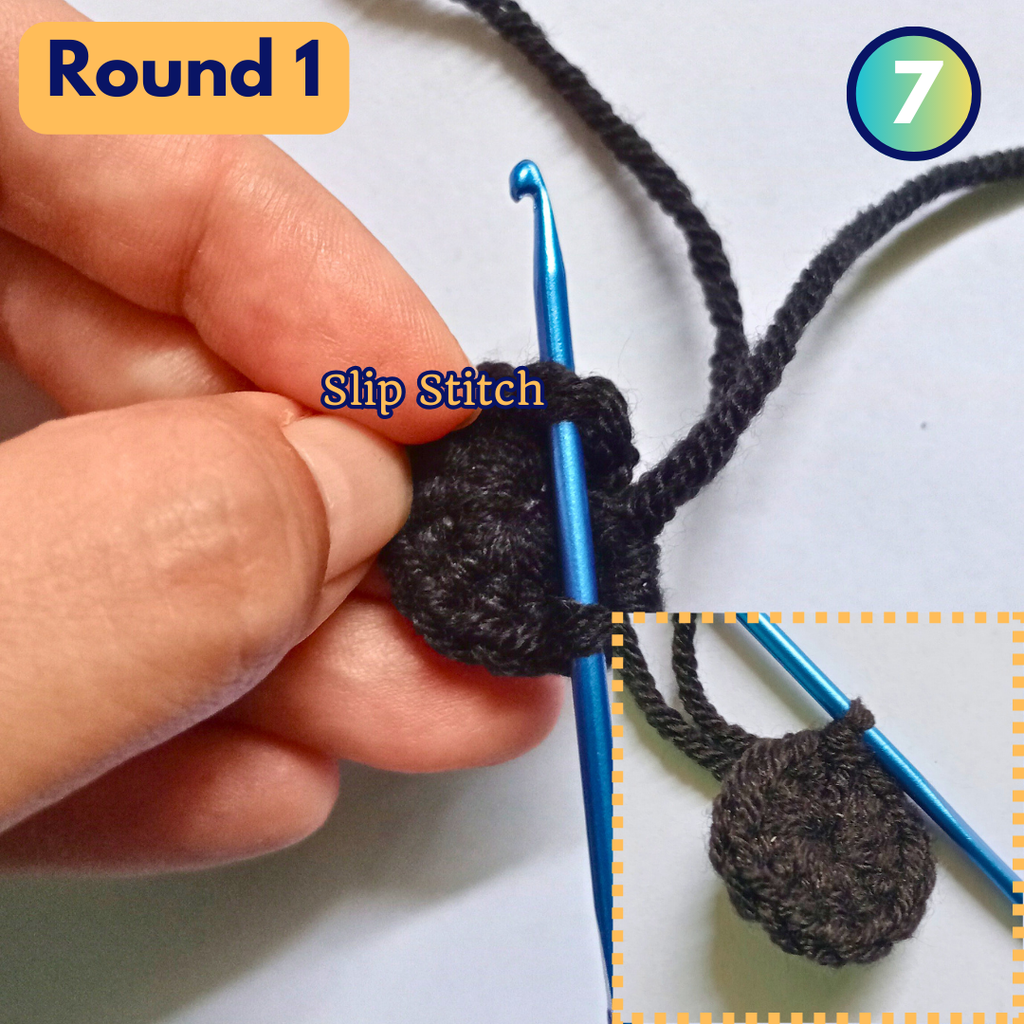
Round 1
Make 12 Double Crochet into the magic circle

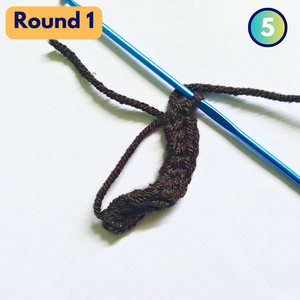
Pull the yarn tail to close the circle completely

Slip Stitch into the first stitch (chain 2 does not count as a stitch).
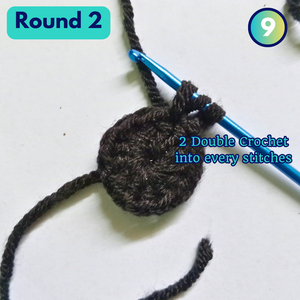
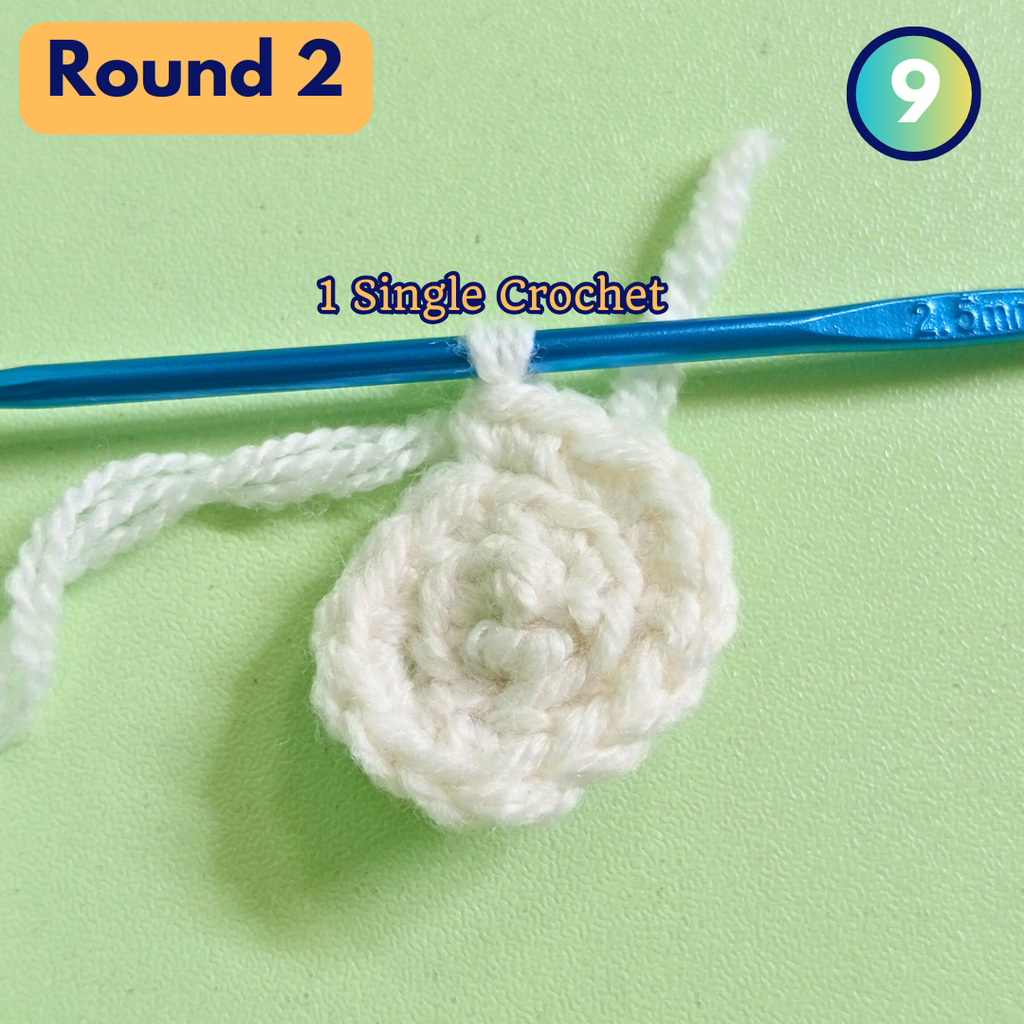
Round 2
Chain 2

2 Double Crochet into every stitch around. So, there will be 24 double crochets in total. It’s always a perfect idea to count to check if you have all 24 stitches
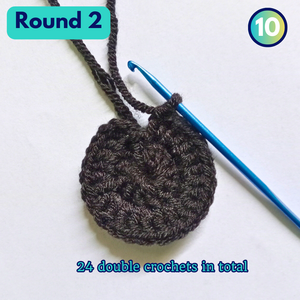
Slip stitch into the very first Stitch

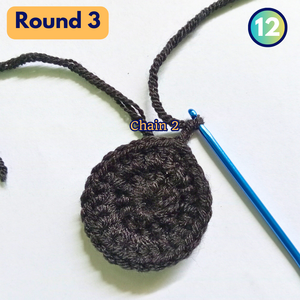
Round 3
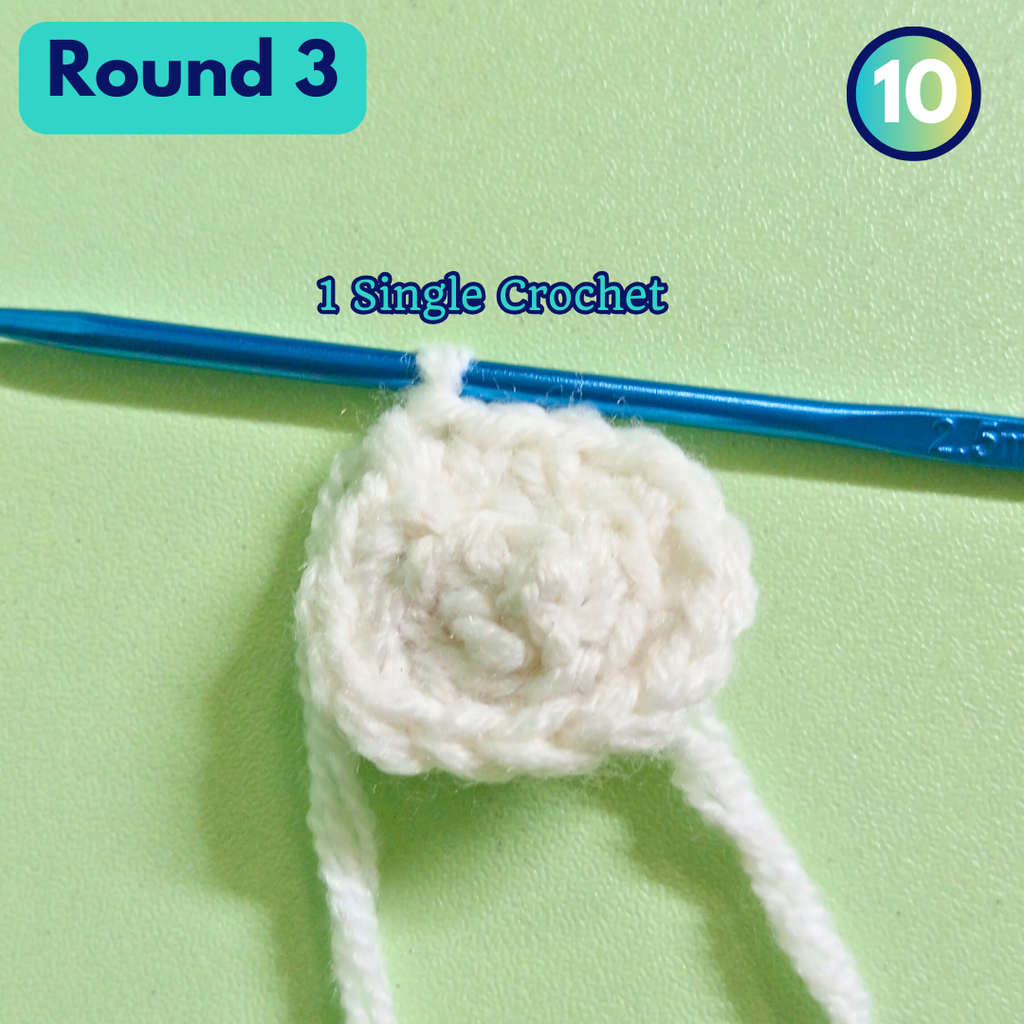
Chain 2
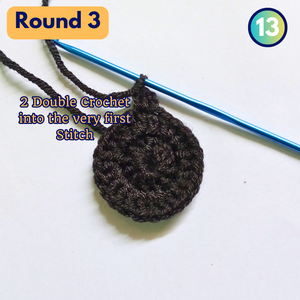
2 Double Crochet into the very first Stitch
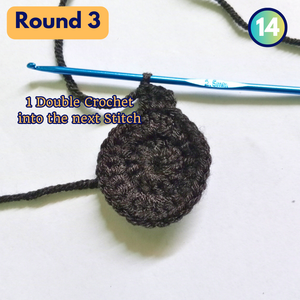
1 Double Crochet into the next Stitch
Repeat all the way around so you will alternate between making 2 double crochet into the next Stitch and 1 double crochet into the next
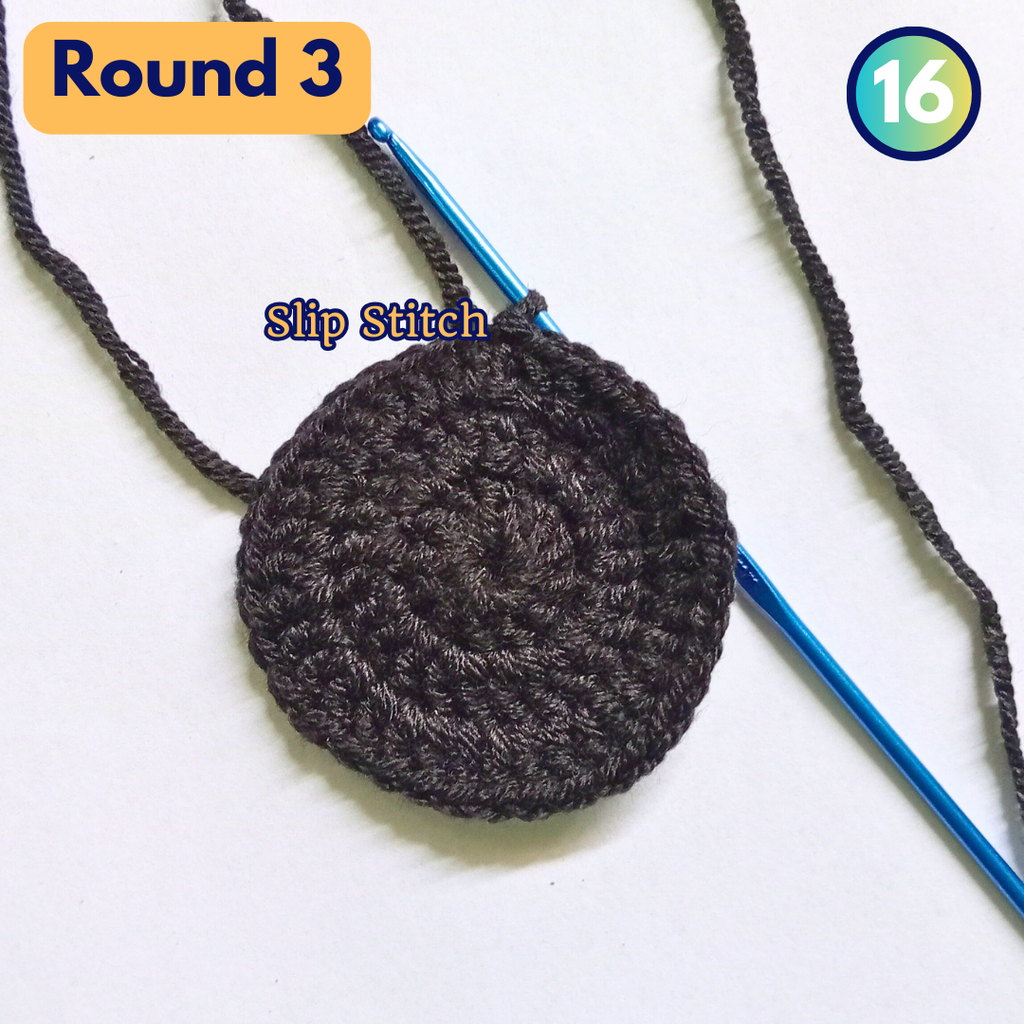
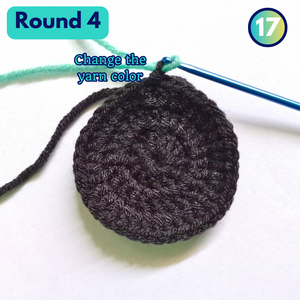
Slip stitch into the very first Stitch. There will be 36 double crochet in this last round.

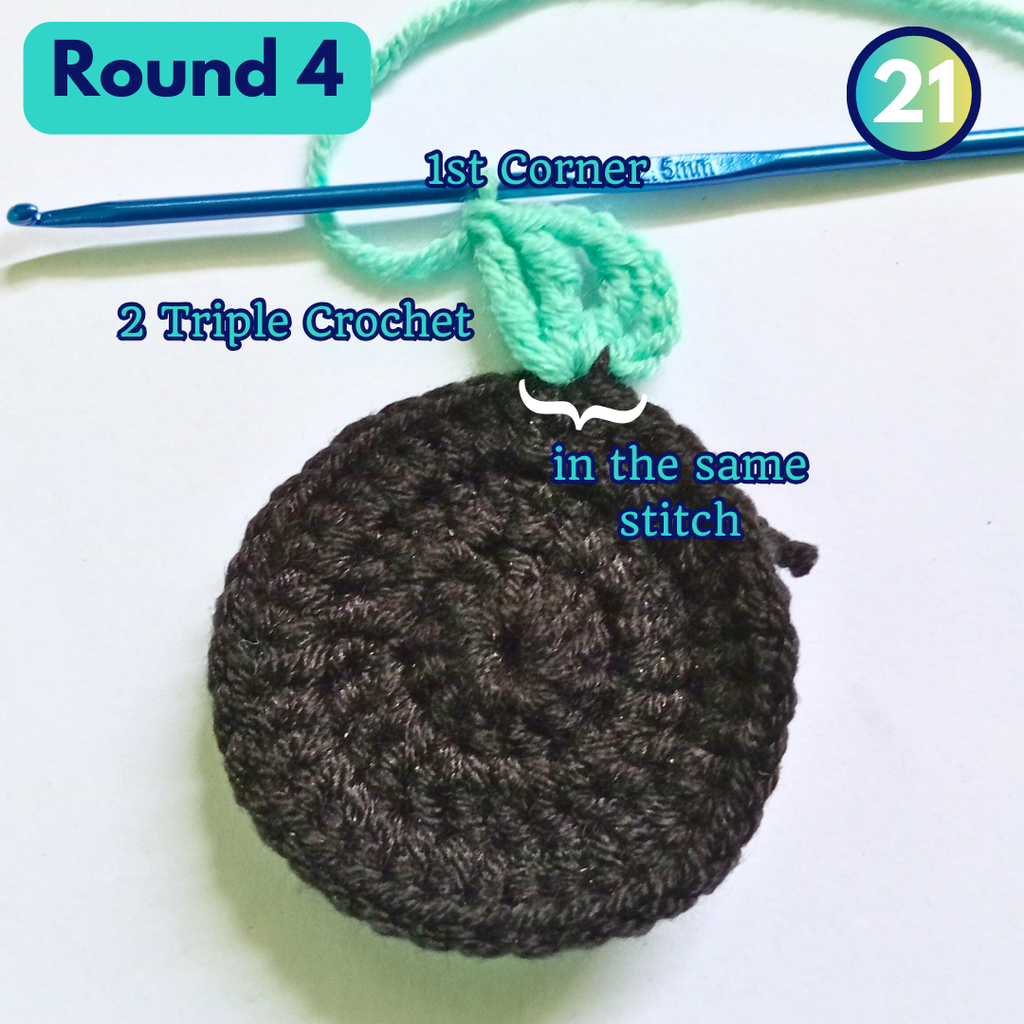
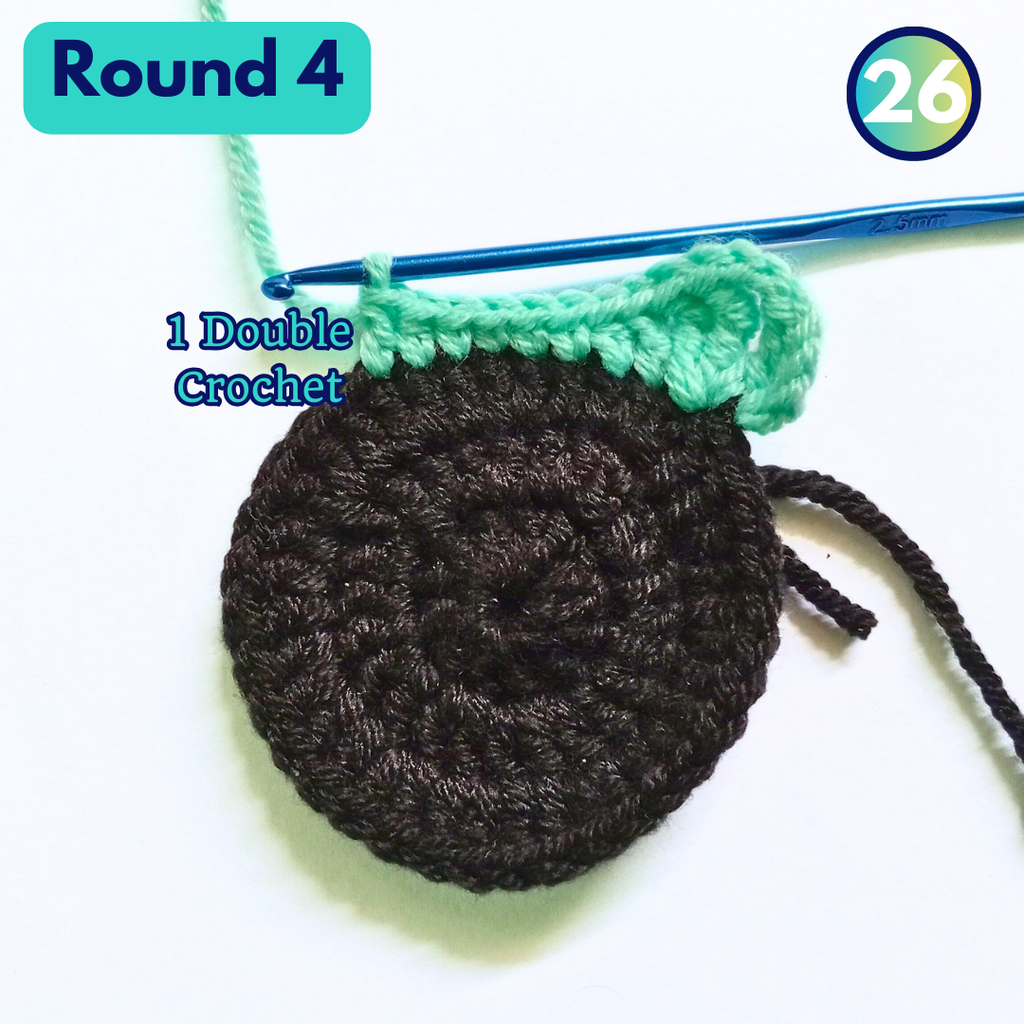
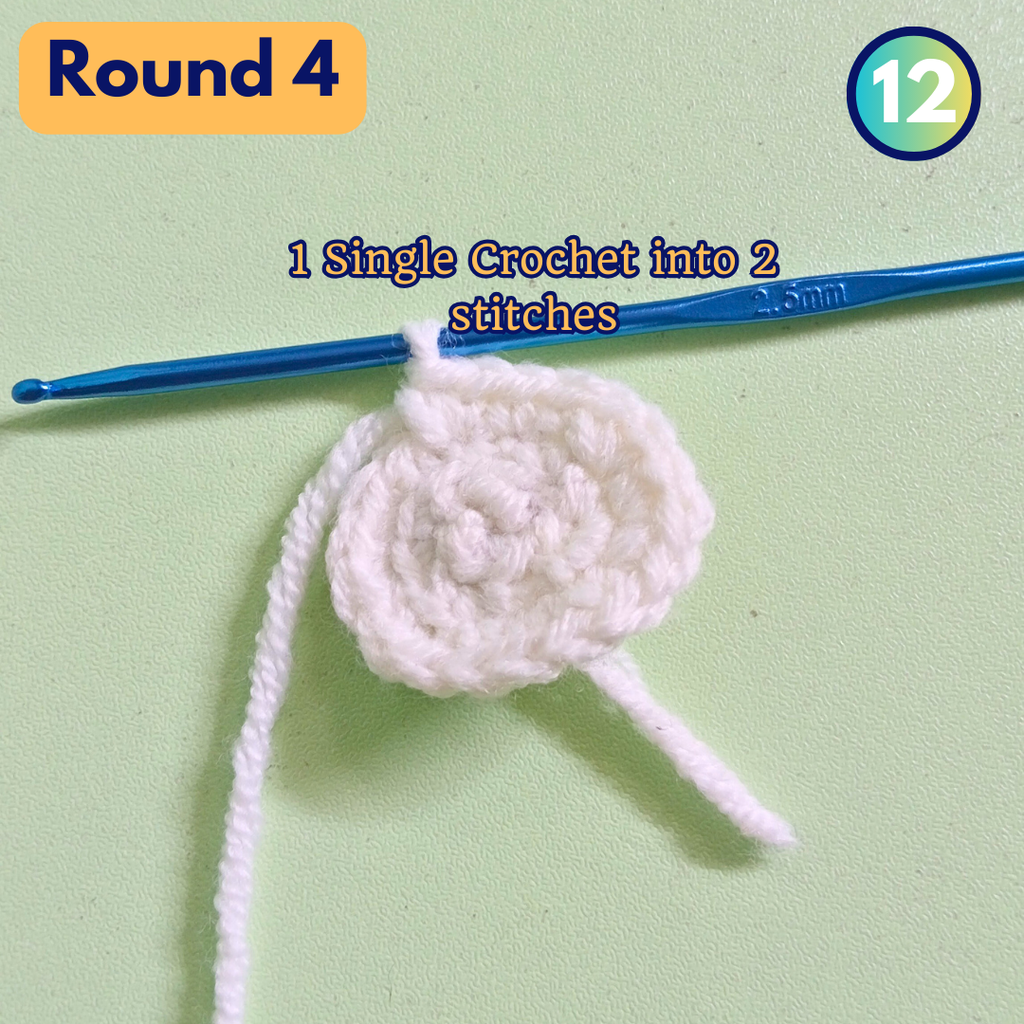
Round 4. Turning the circle into a square
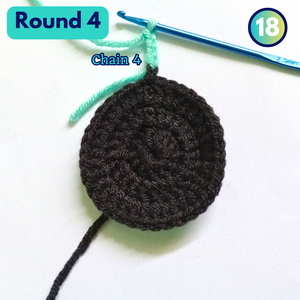
Change the yarn color while pulling the yarn through the loop on the hook.
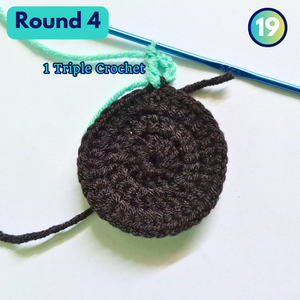
Chain 4 (will count as the first Triple Crochet of the round), 1 Triple Crochet into the same Stitch, Chain 2, 2 Triple Crochet into the same Stitch – that’s the 1st Corner made
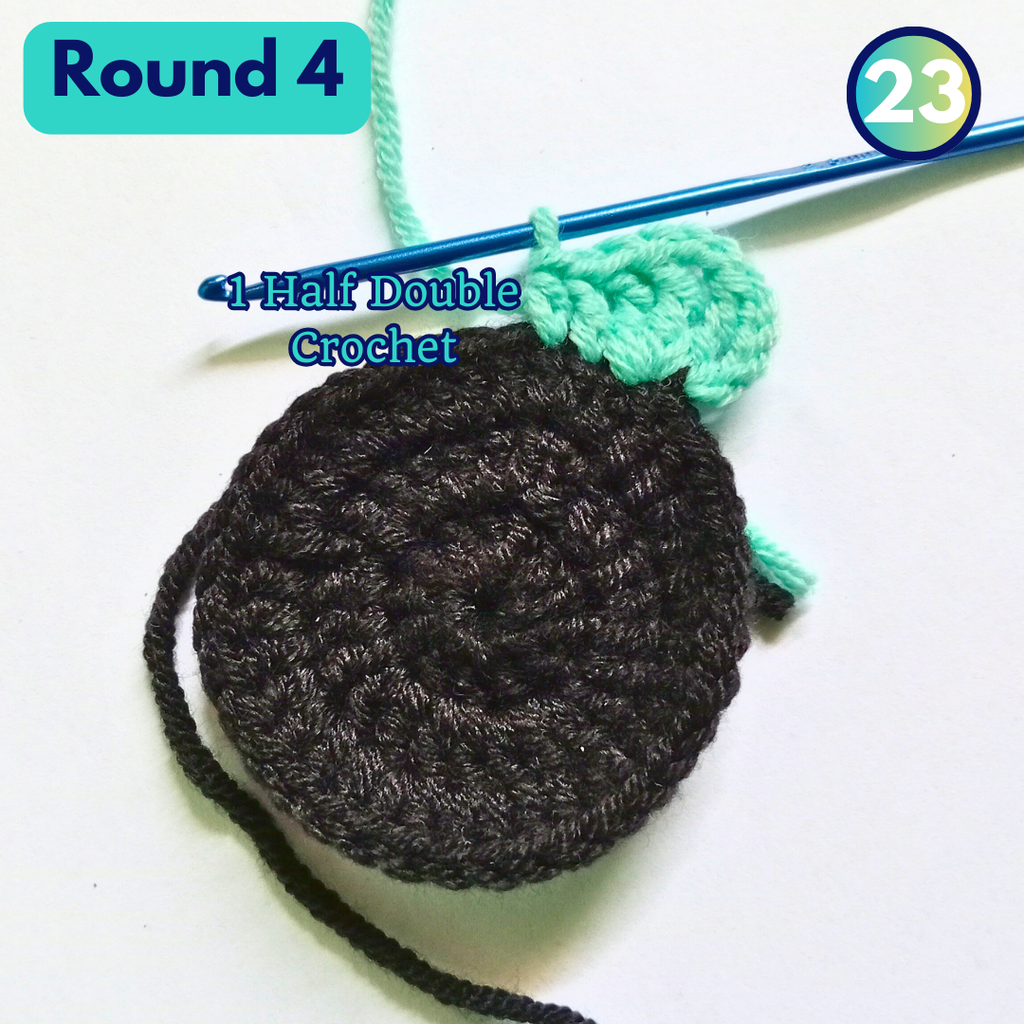
1 Double Crochet into the next Stitch

1 Half Double Crochet into the next Stitch
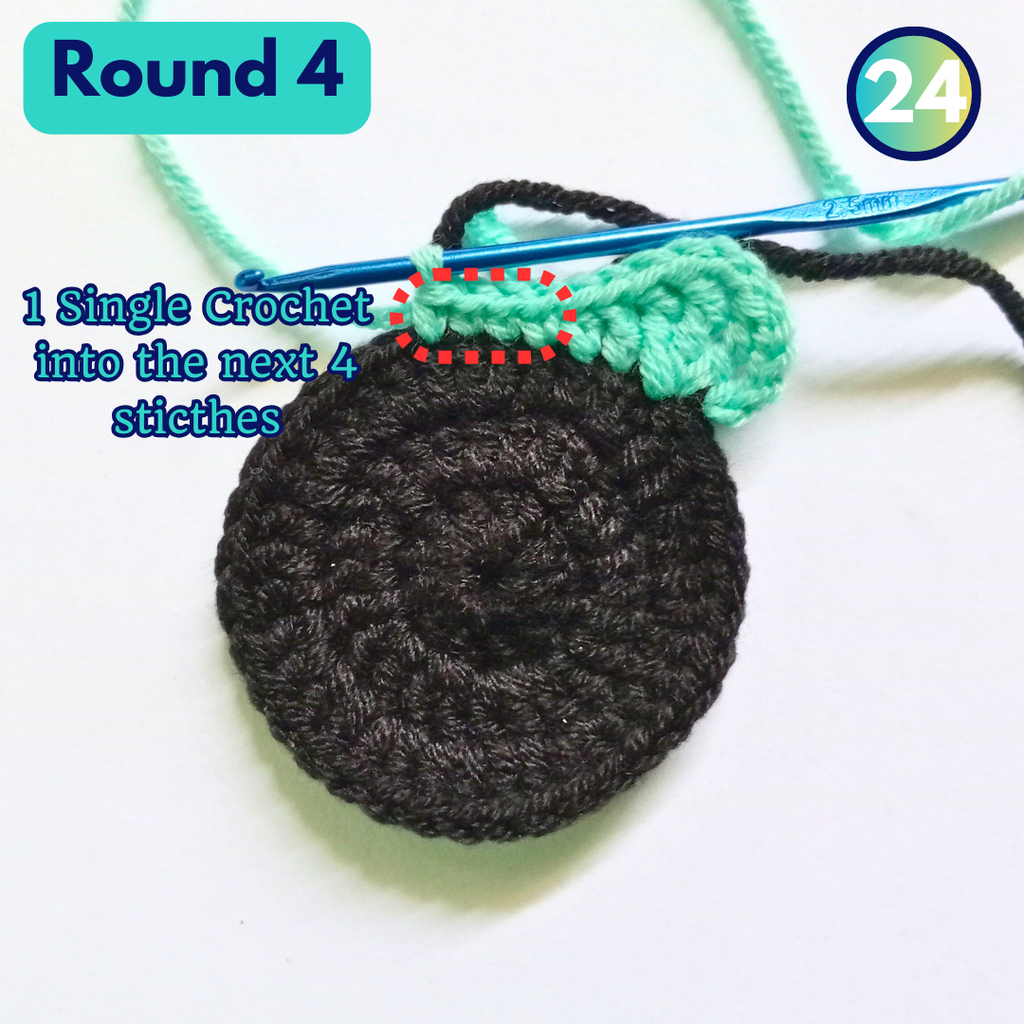
1 Single Crochet into the next 4 Stitches
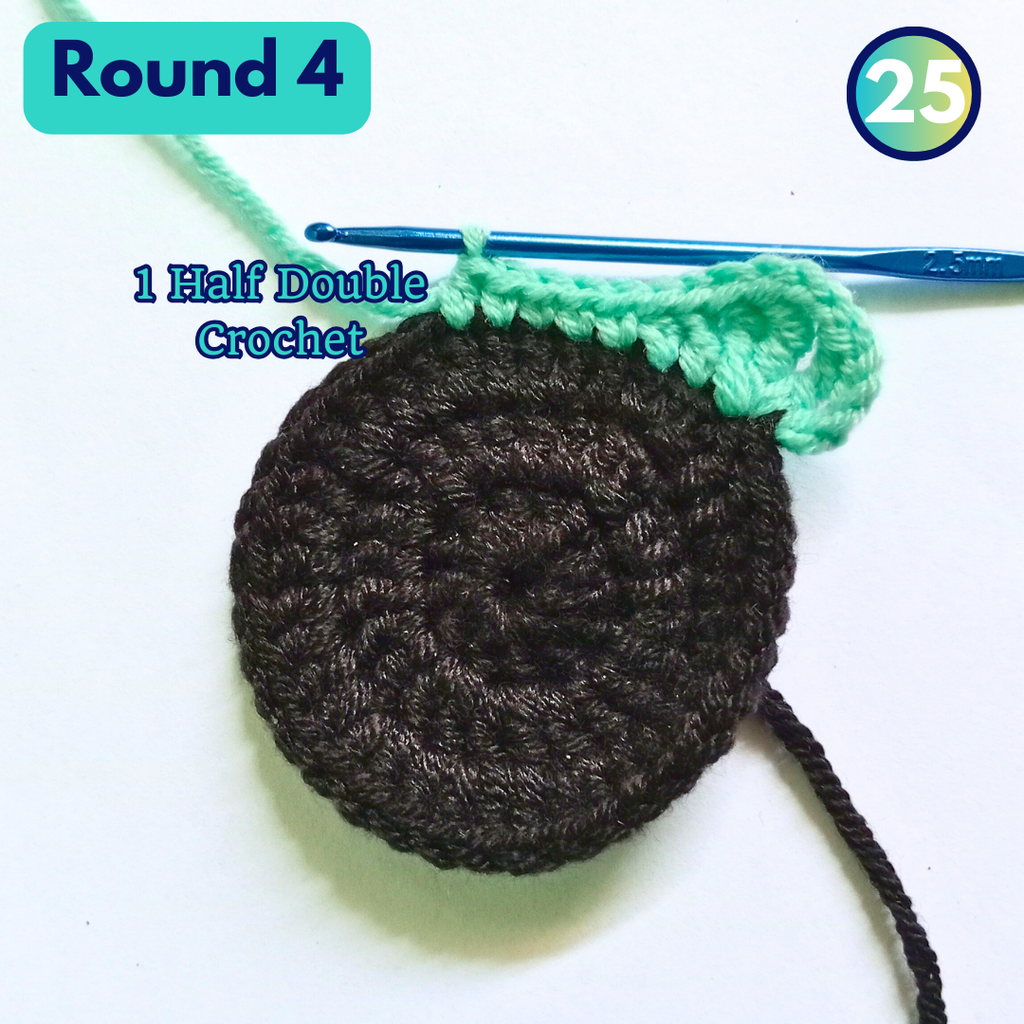
1 Half Double Crochet into the next Stitch
1 Double Crochet into the next Stitch
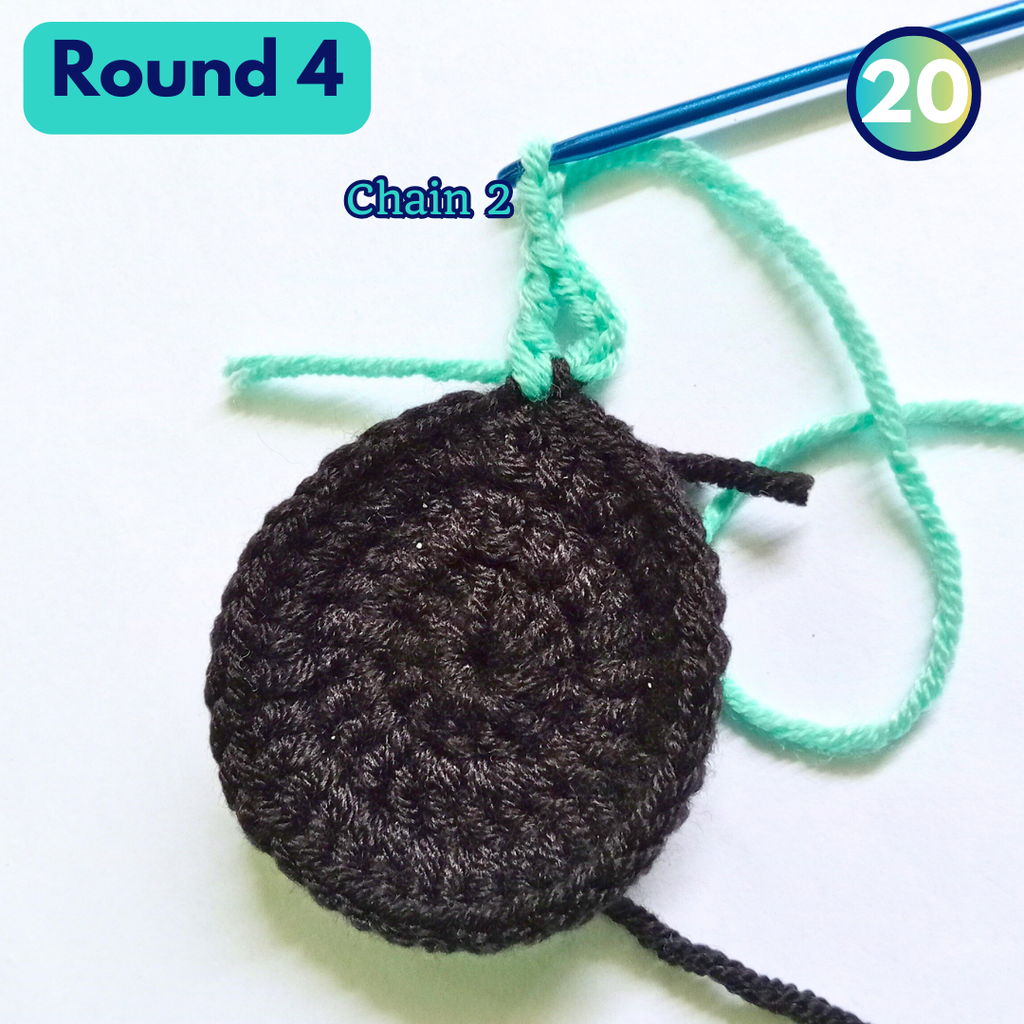
Repeat the making of the corner (2TC, Ch2, 2TC) into the next Stitch

Make the next side of your square just like you did before

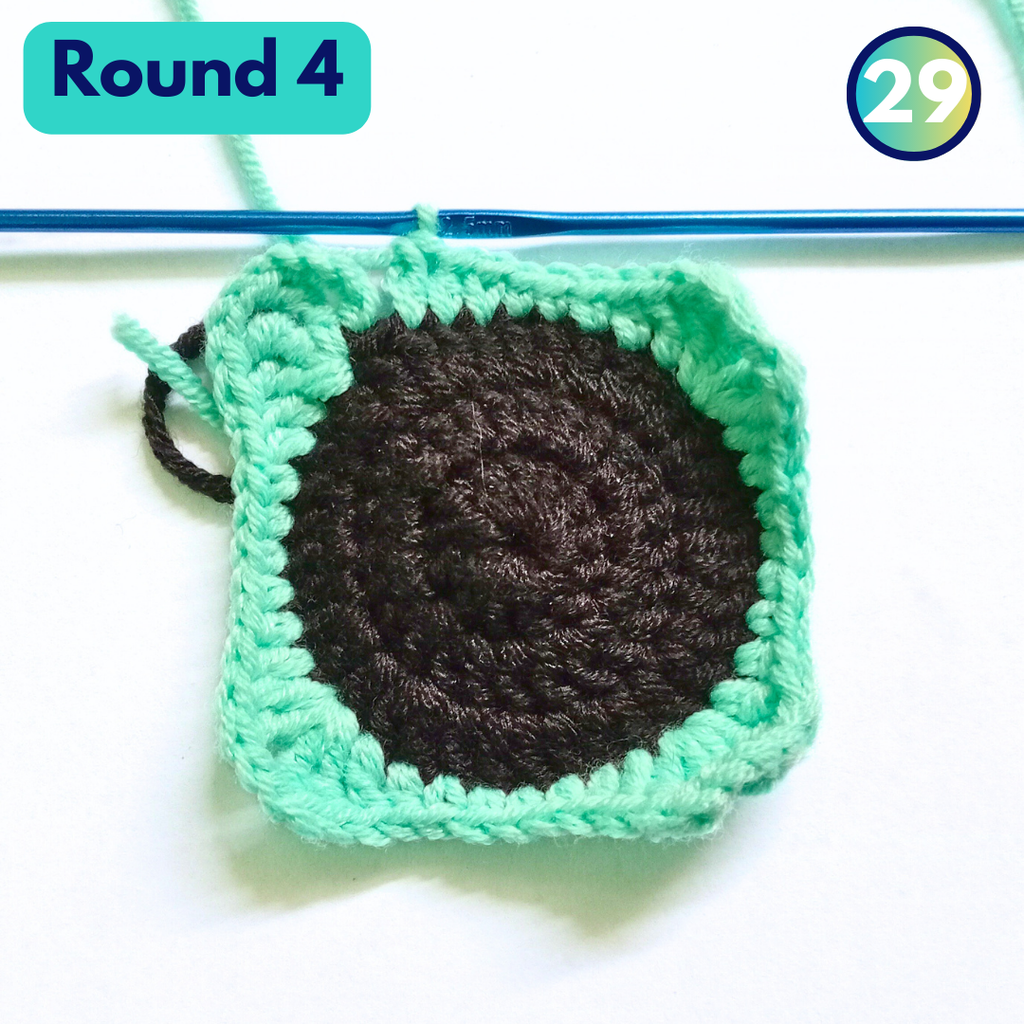
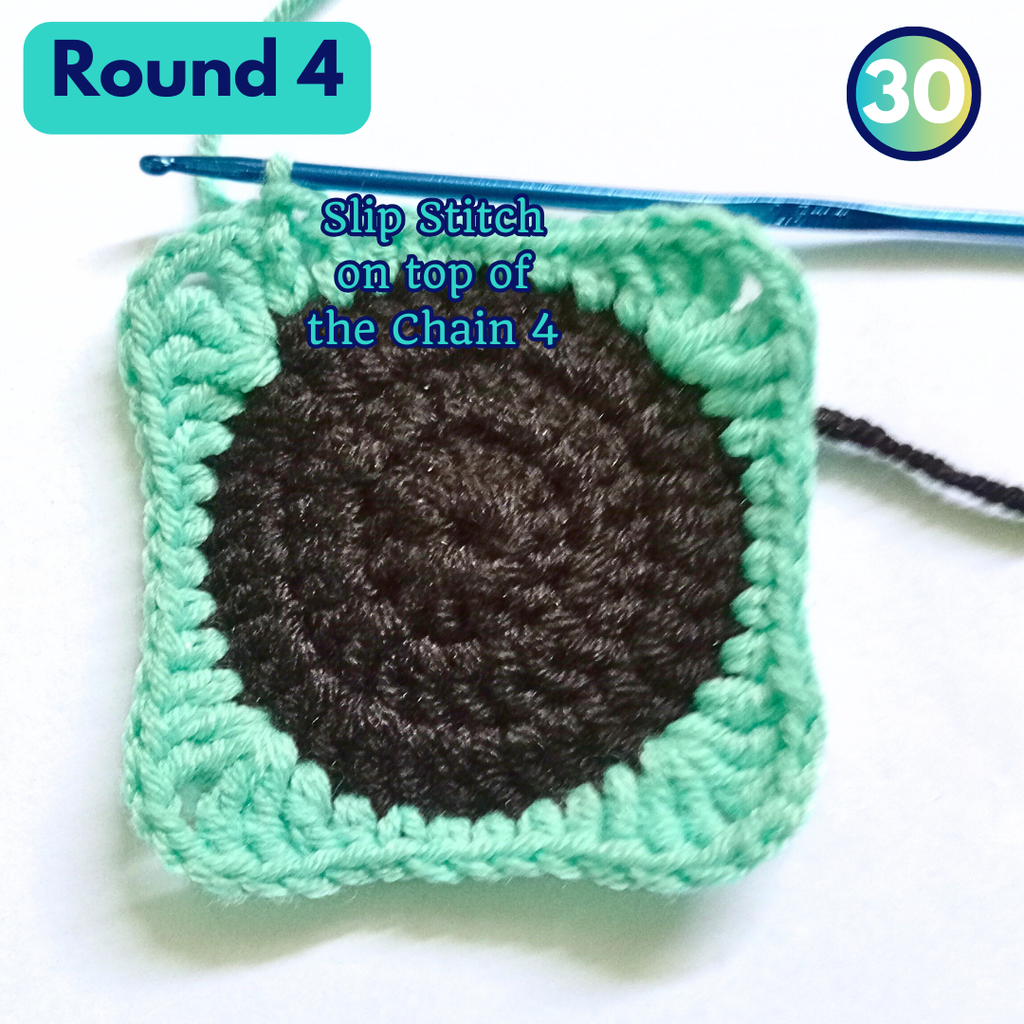
Slip Stitch on top of the Chain 4
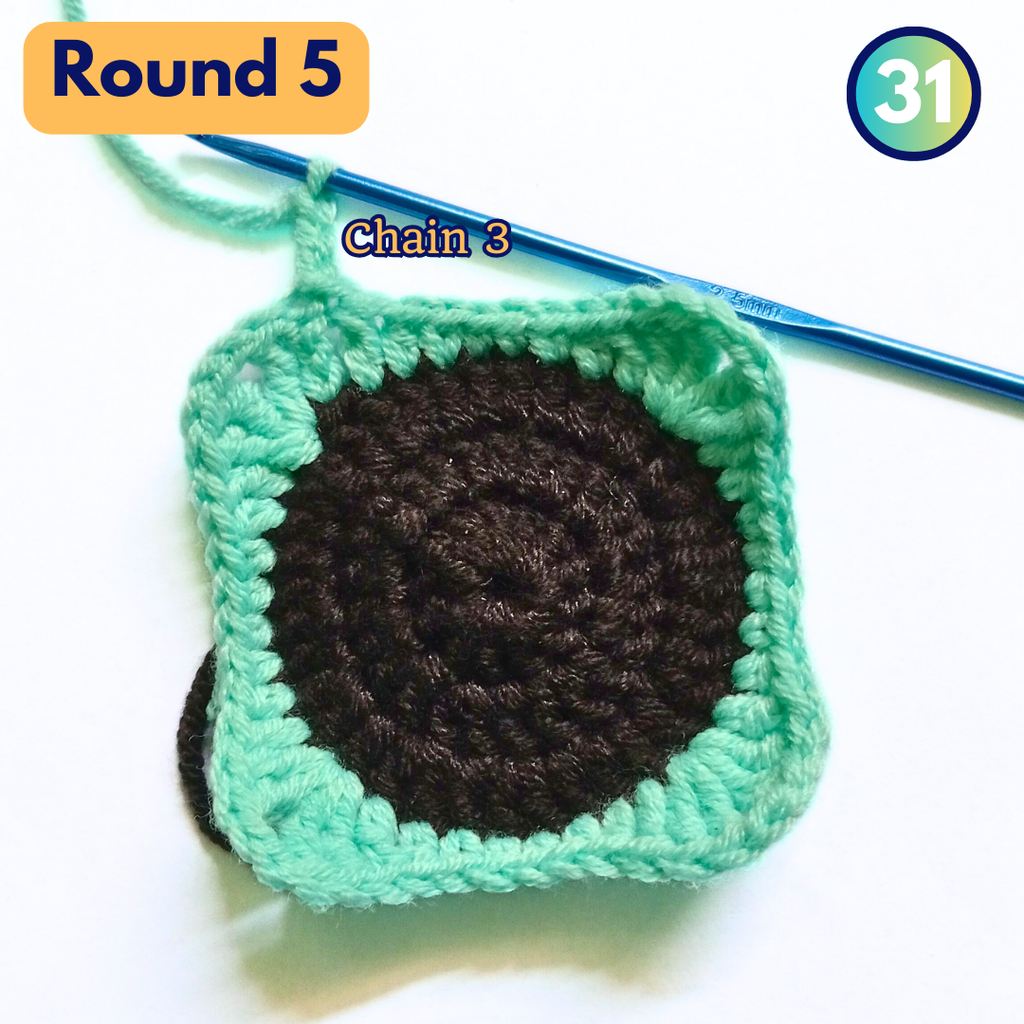
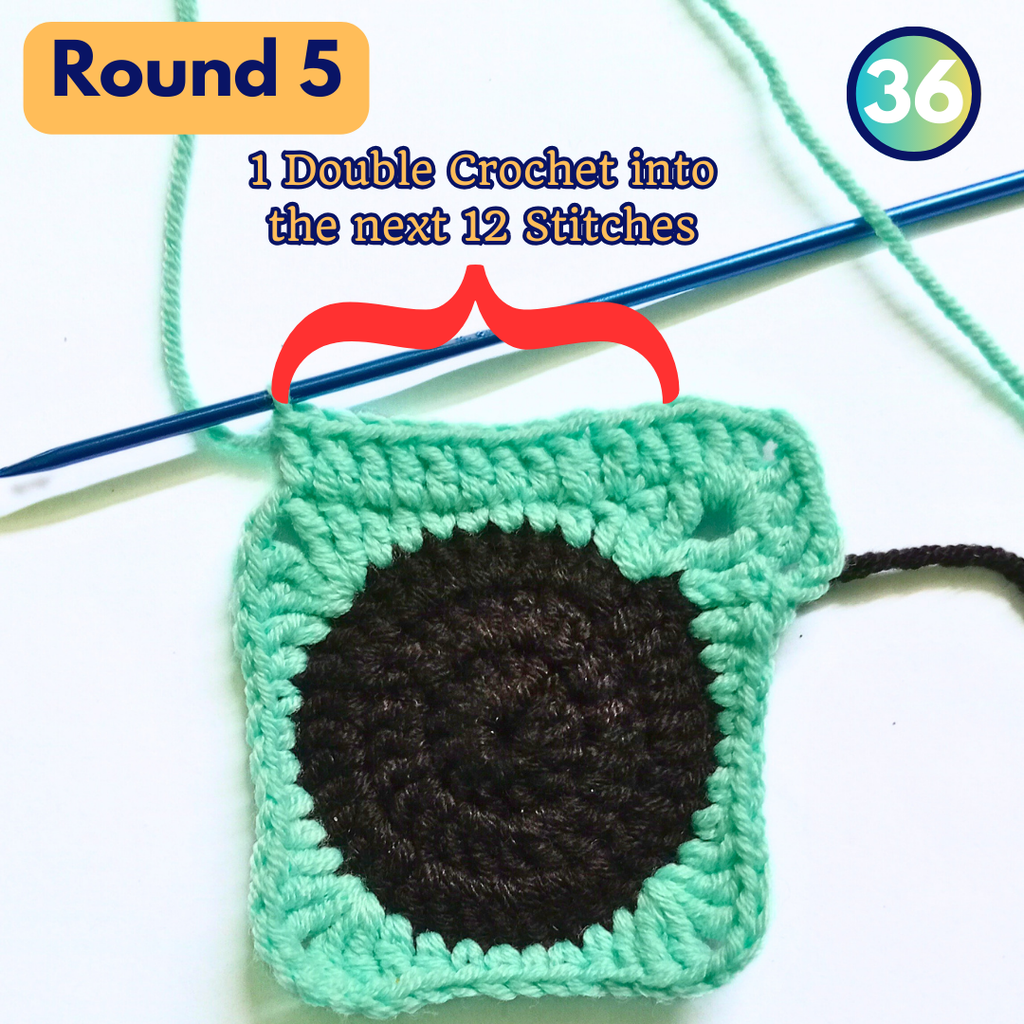
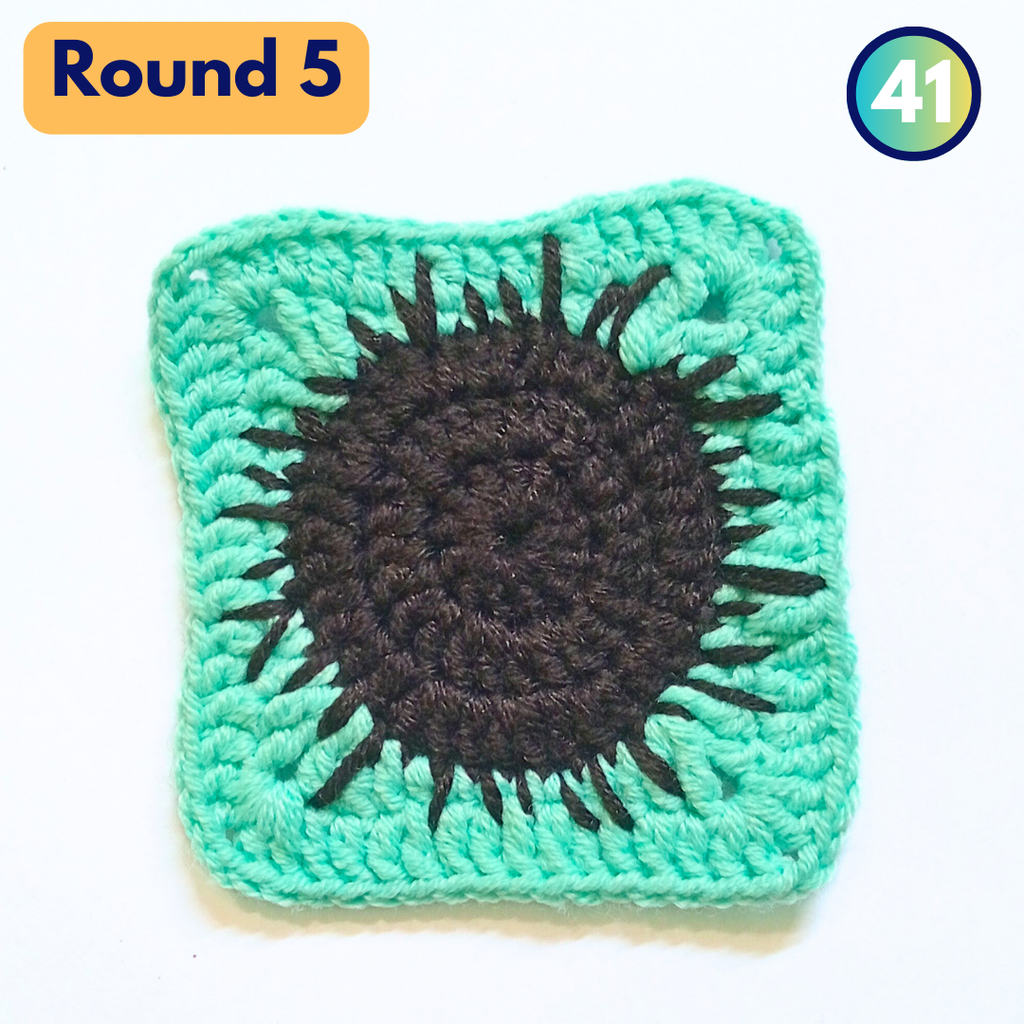
Round 5
Chain 3 (will count as the first double crochet of the round)
1 Double Crochet into the next Stitch
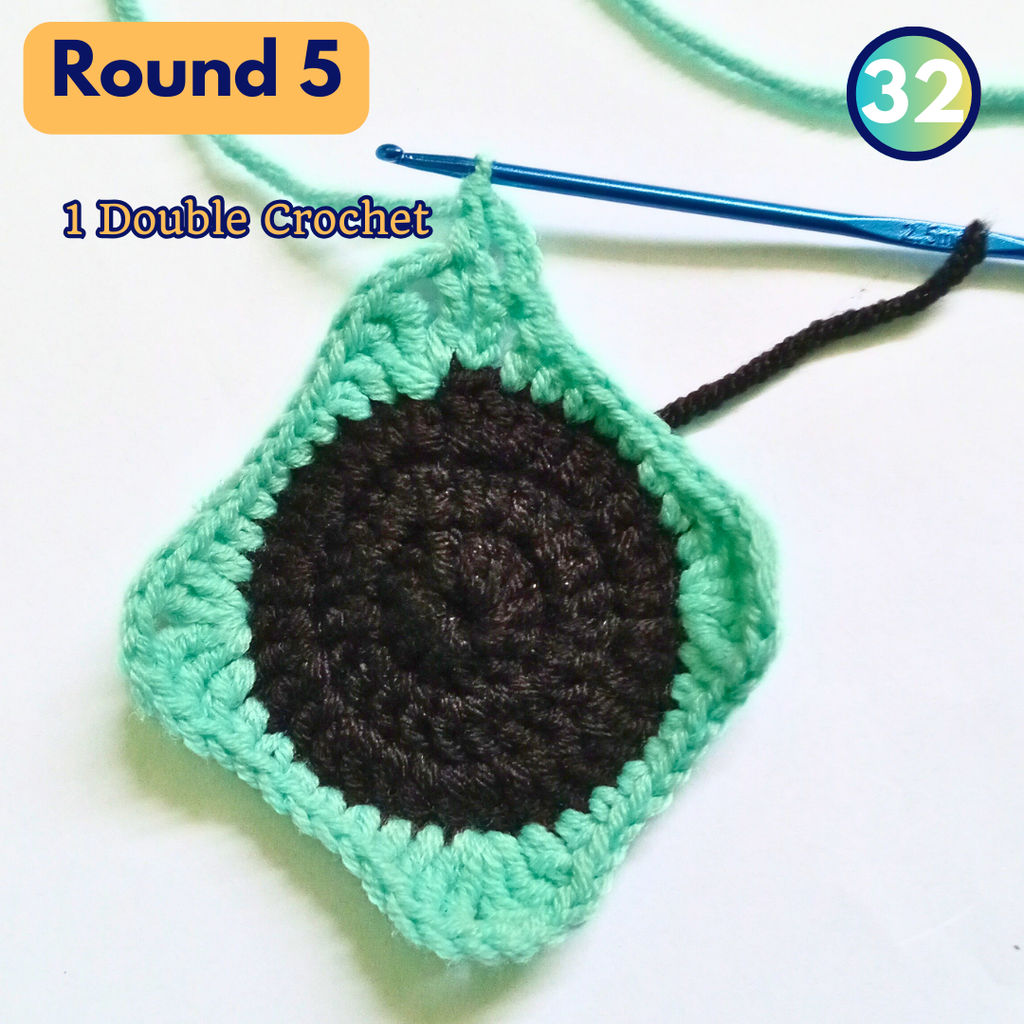
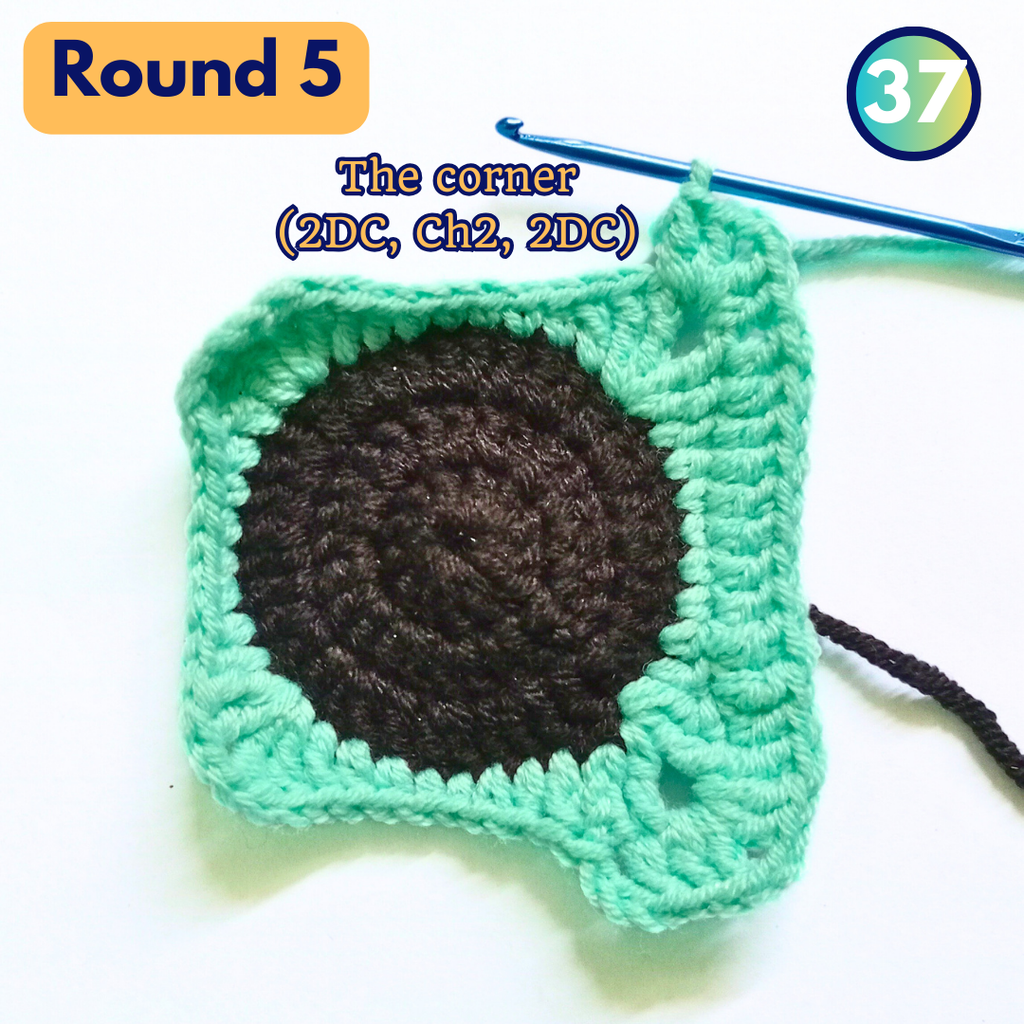
2 Double Crochet into the corner of round 4, Chain 2, 2 Double Crochet into the same Stitch – that’s the 1st Corner made in round 5
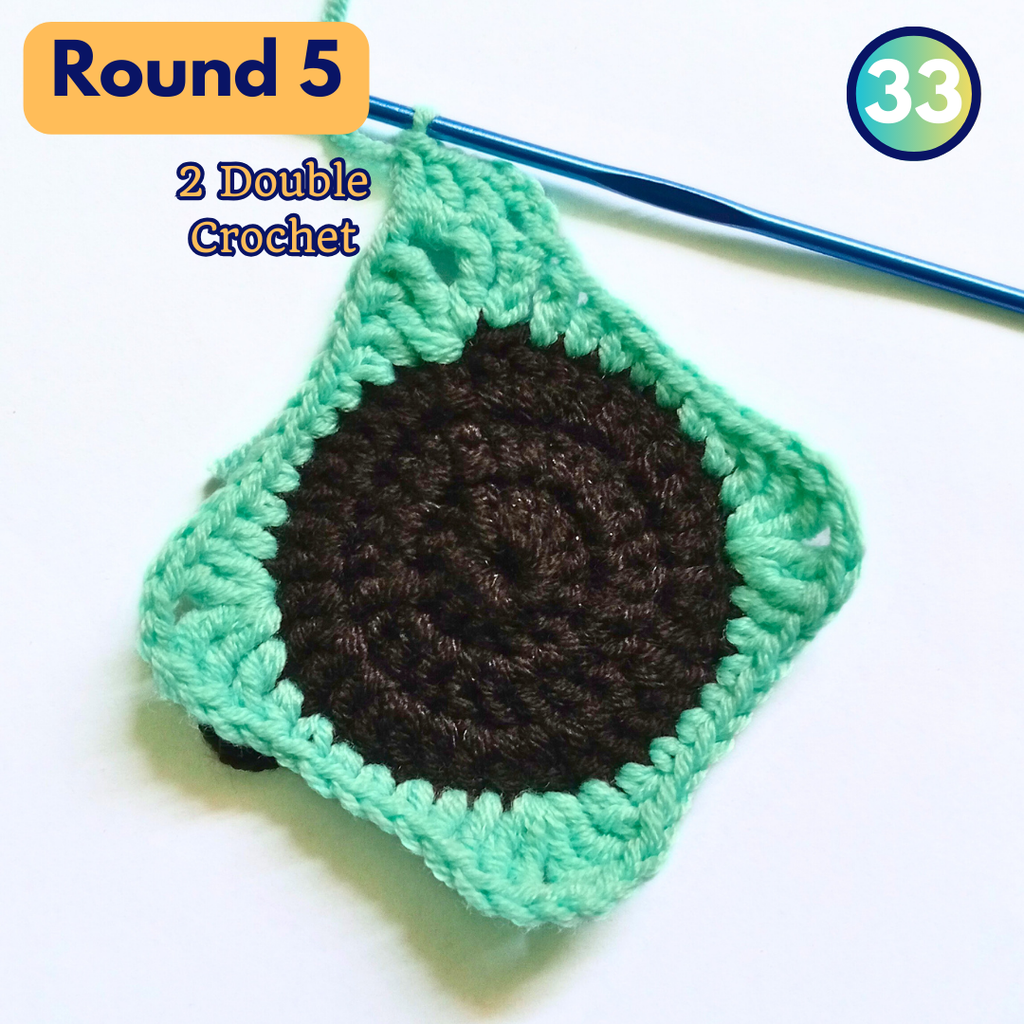
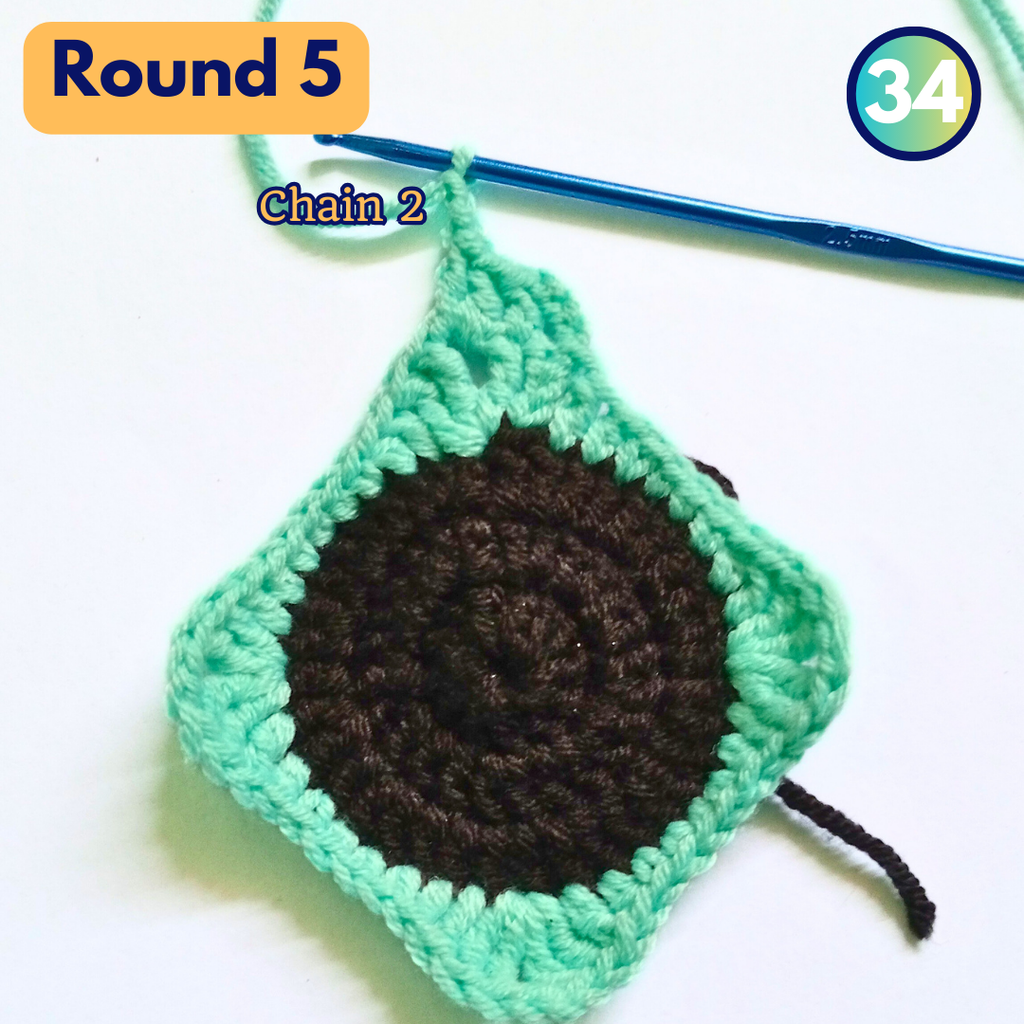
1 Double Crochet into the next 12 Stitches
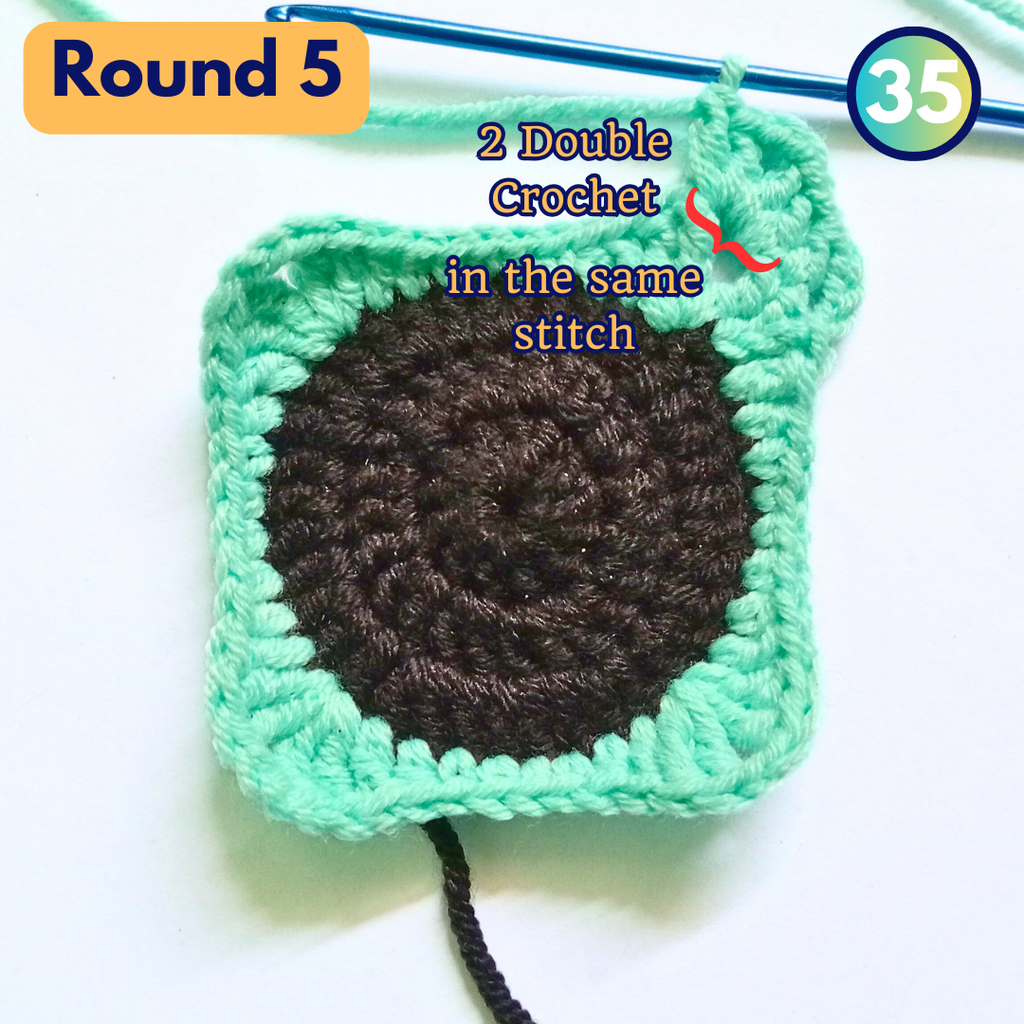
Repeat the making of the corner (2DC, Ch2, 2DC) into the next Stitch
Make the next side of your square just like you did before (the last side will be 1 Double Crochet into the next 10 Stitches, instead of 12)
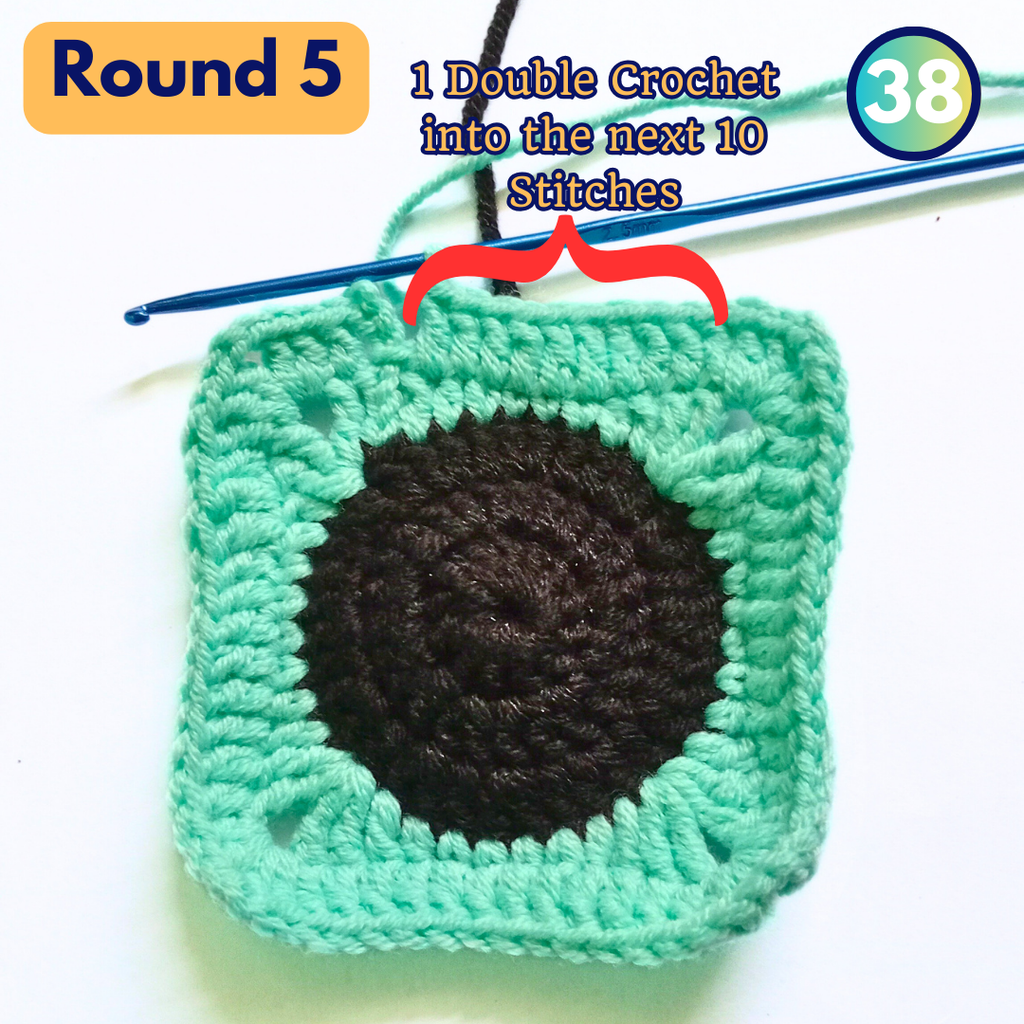
Slip Stitch on top of Chain 3

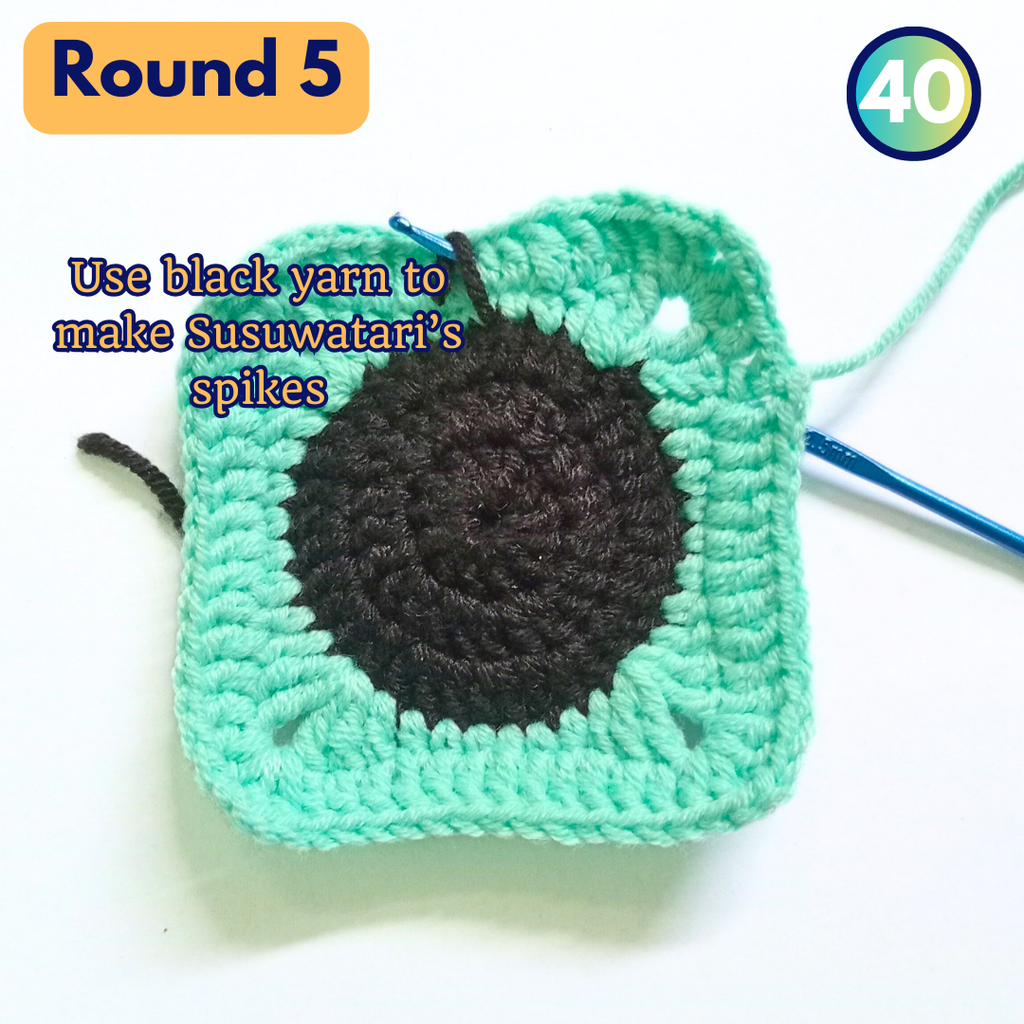
Fastening off and weaving in the ends
All that’s left to do now is to weave in the yarn Tails here on the back side
Don’t forget to make the spikes of Susuwatari by simply embroider the little fuzz marks. Make them like different lengths, and connect some just like play around with it. Don’t be too exact or anything. Personally, I think it should be a little bit wonky. [pict. 41]
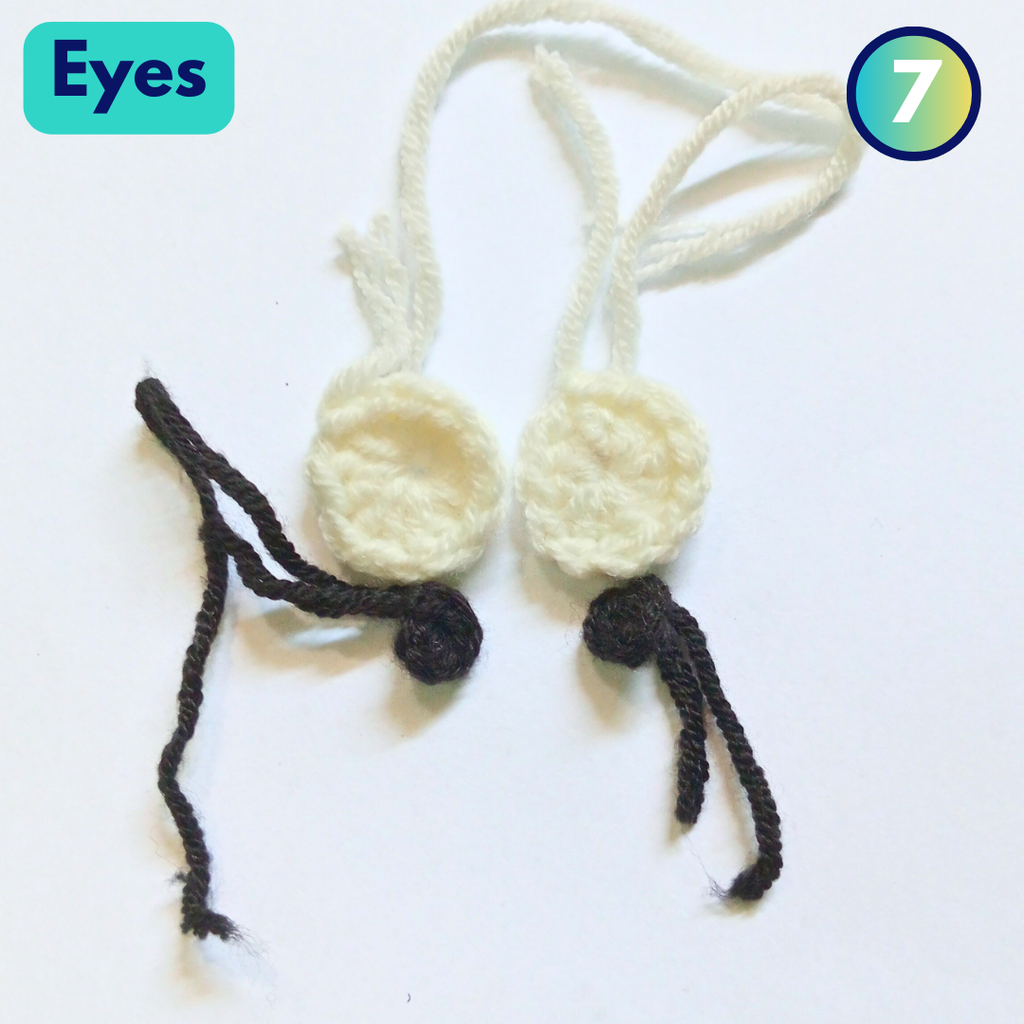
Step 2: Susuwatari | Eyes and Star Candy
Eyes: White
Magic Circle, Chain 2

Make 12 Double Crochet into the magic circle
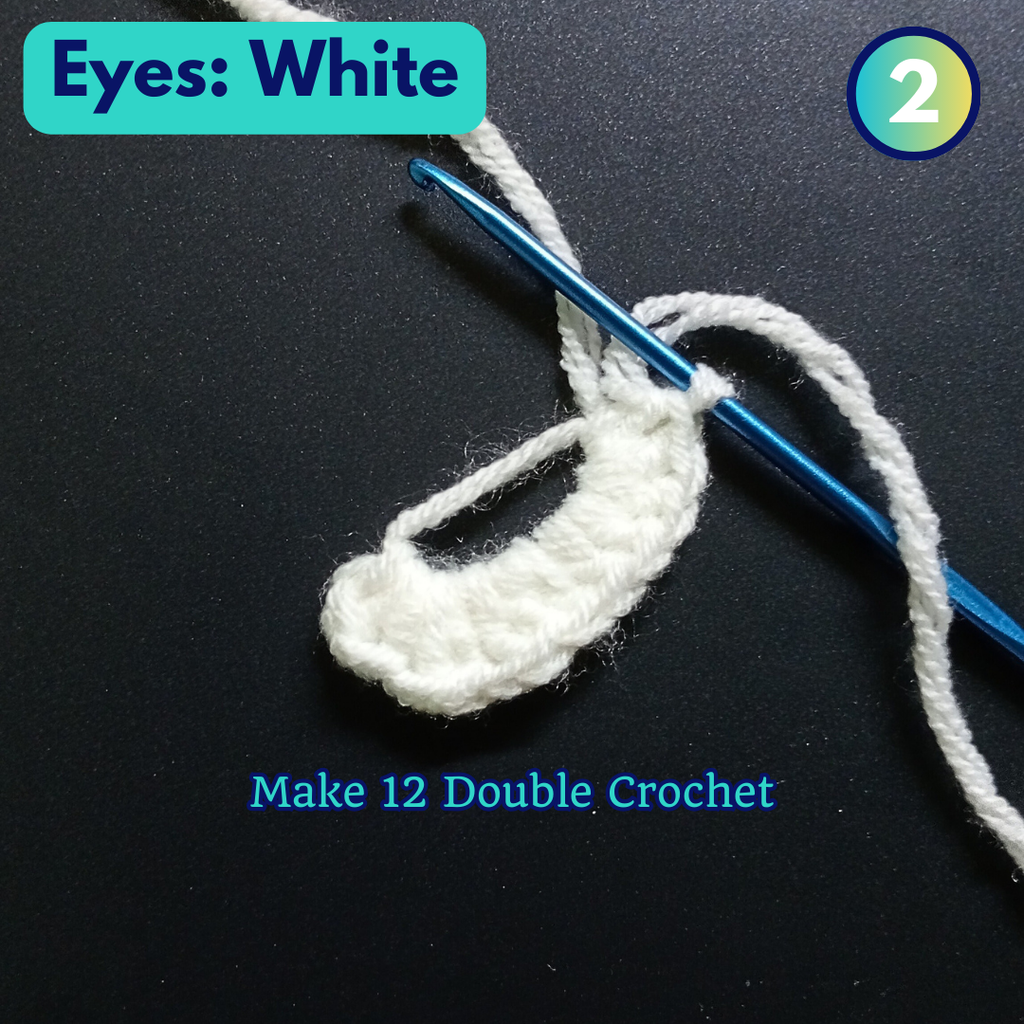
Slip Stitch into the first stitch (chain 2 does not count as a stitch).
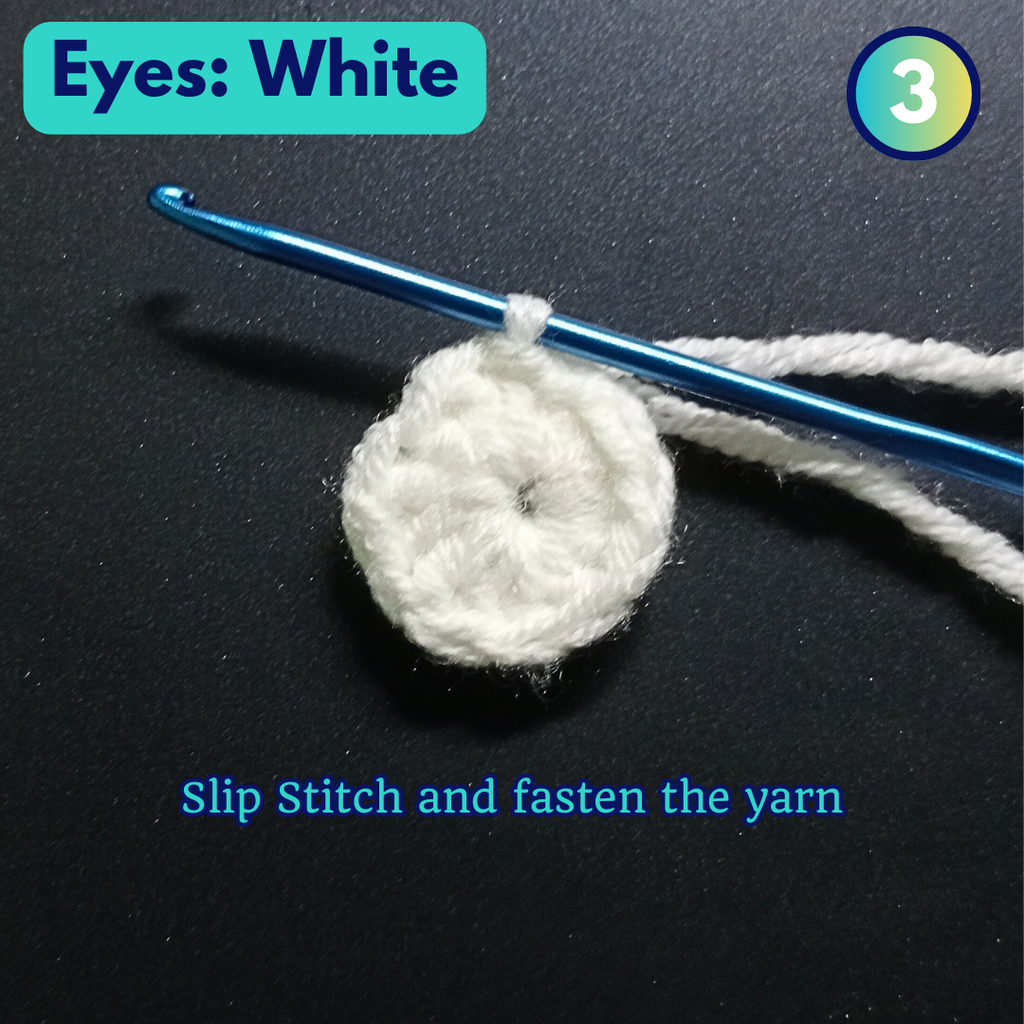
Pull the yarn tail to close the circle completely
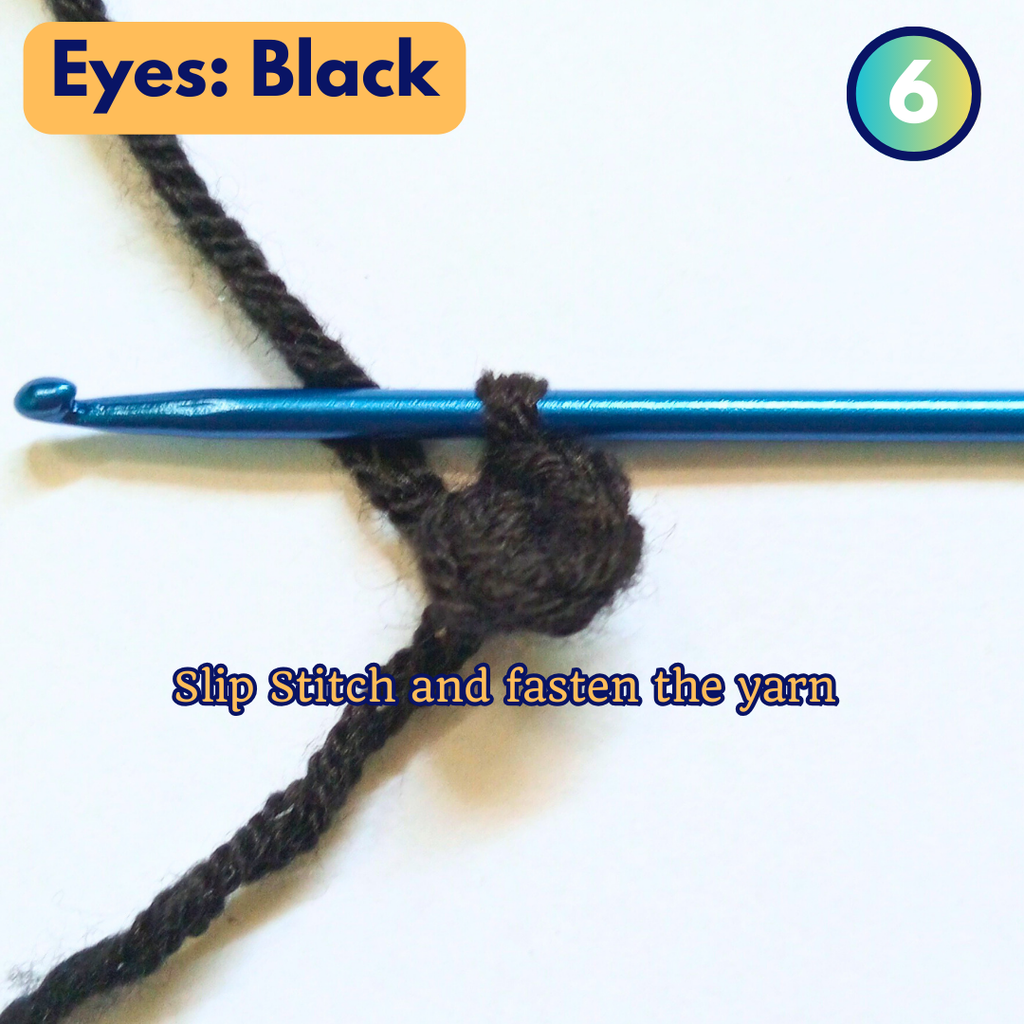
Eyes: Black
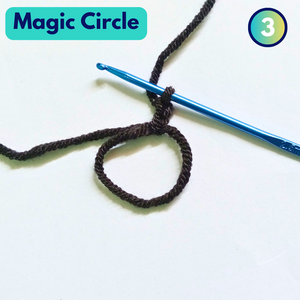
Magic Circle

Make 5 Single Crochet into the magic circle
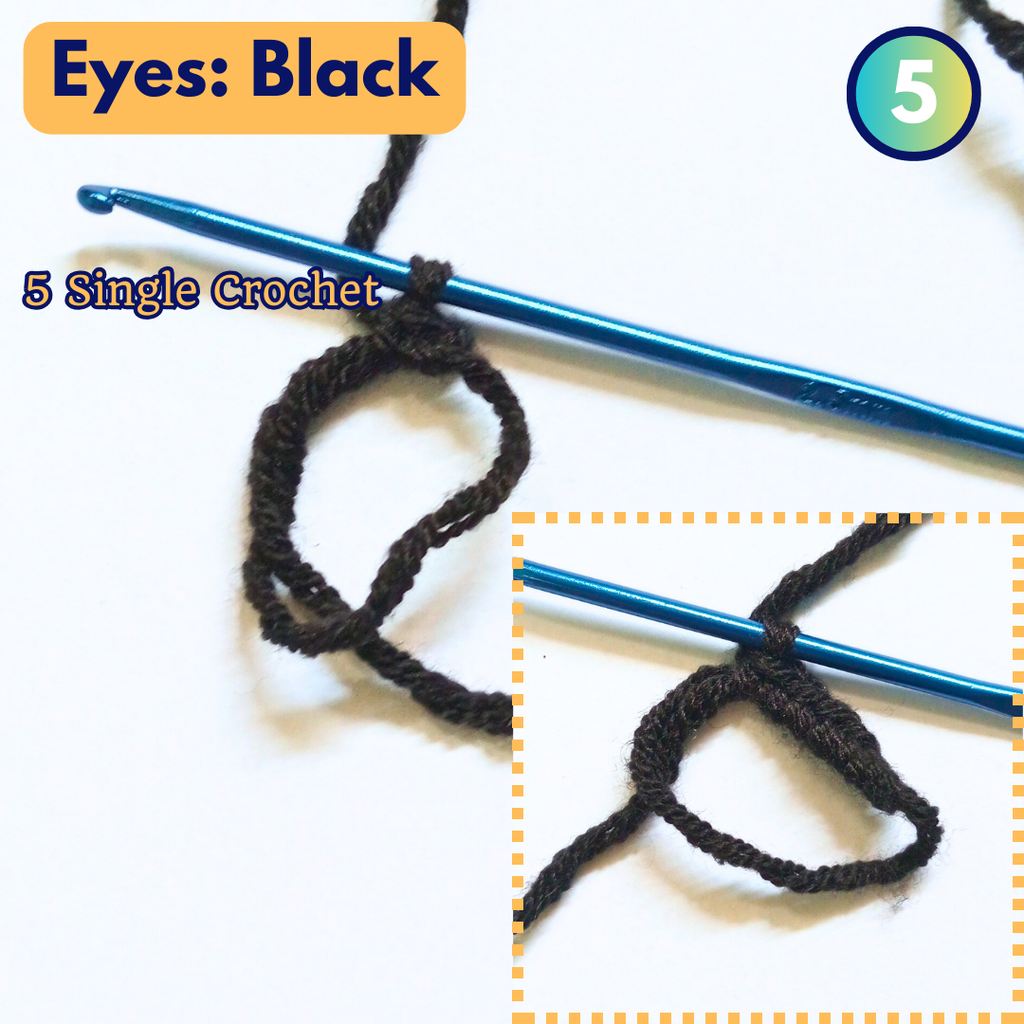
Pull the yarn tail to close the circle completely
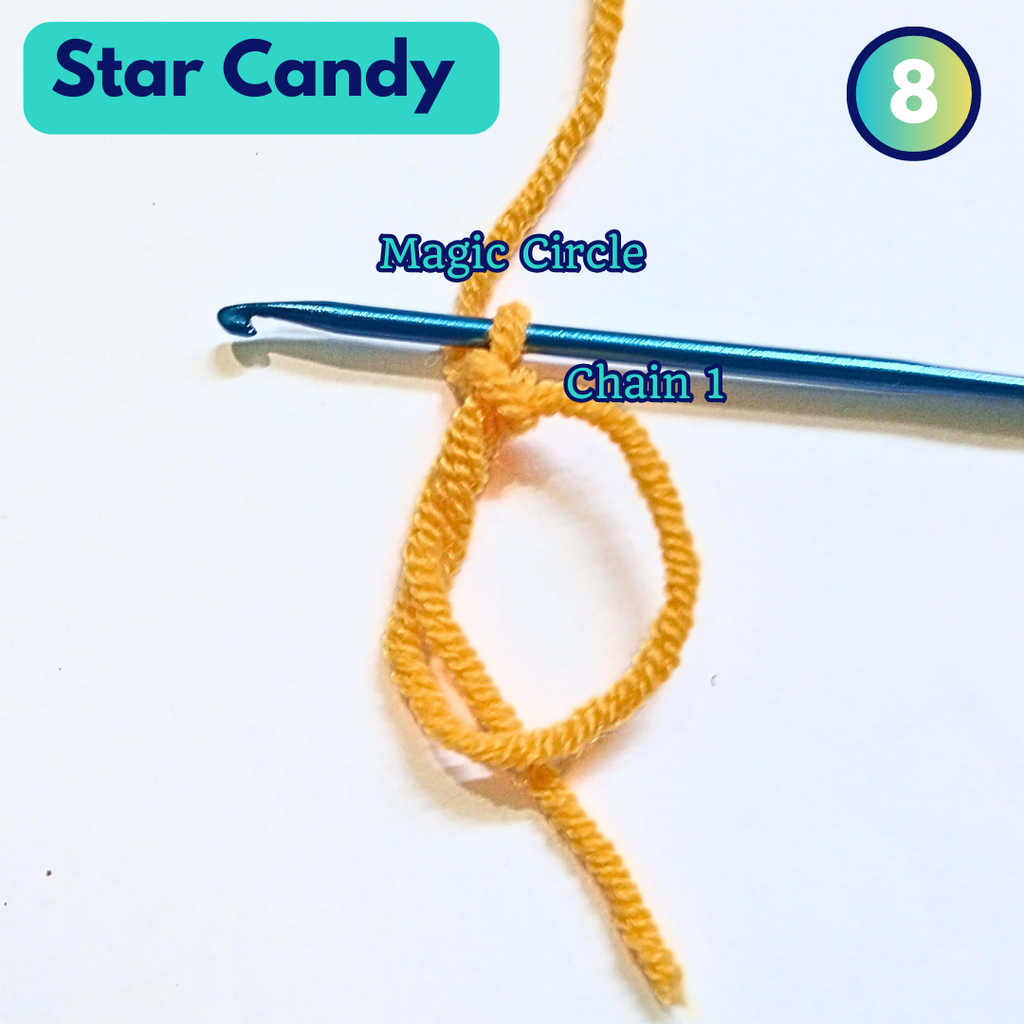
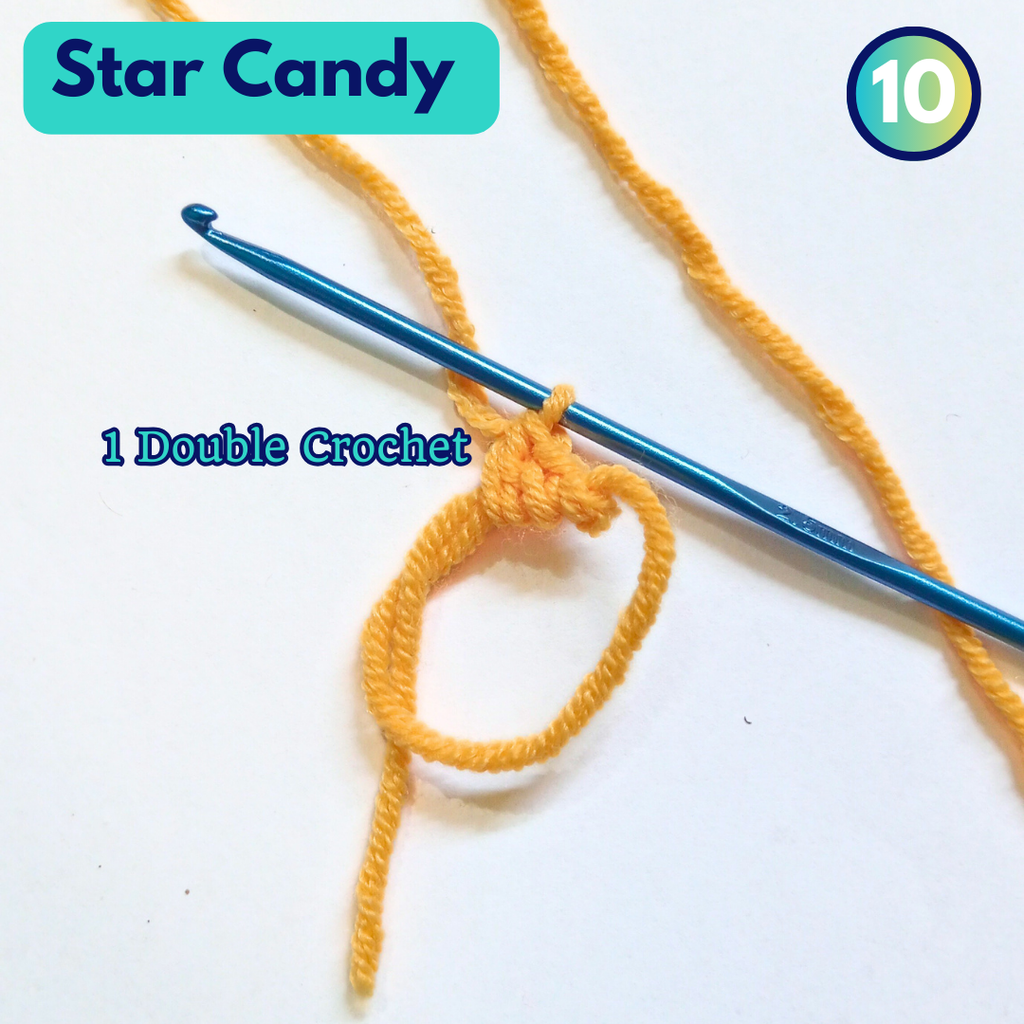
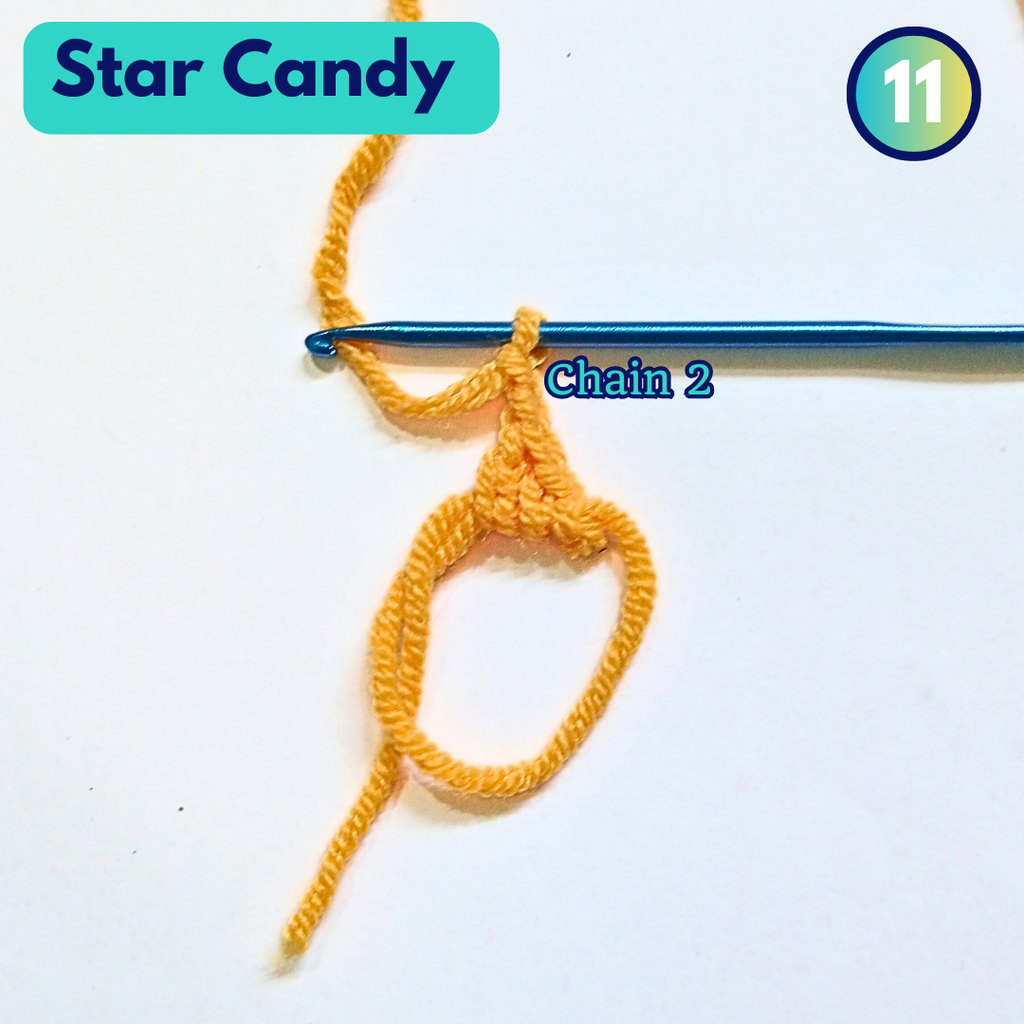
Star Candy
Magic Circle
Chain 1
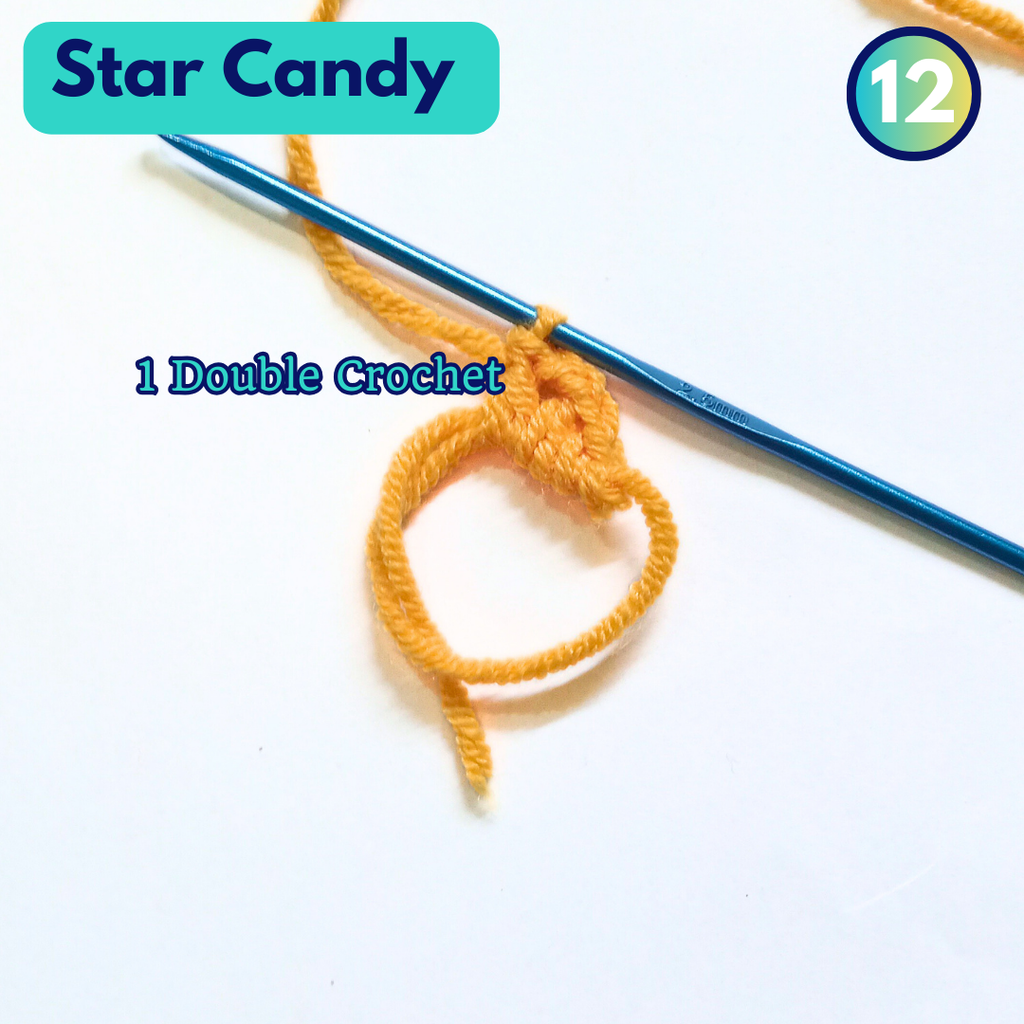
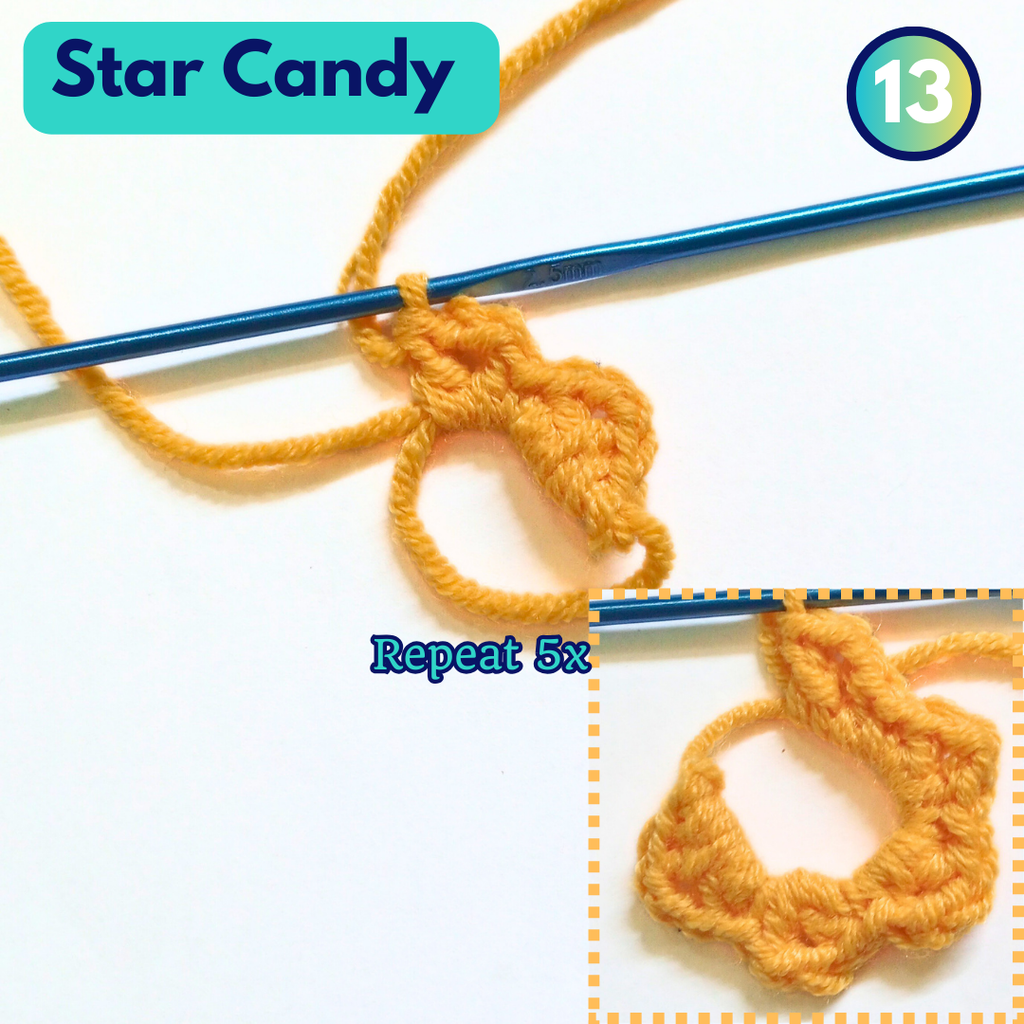
1 Single Crochet, 1 Double Crochet, Chain 2, 1 Double Crochet – Repeat 5x

1 Single Crochet
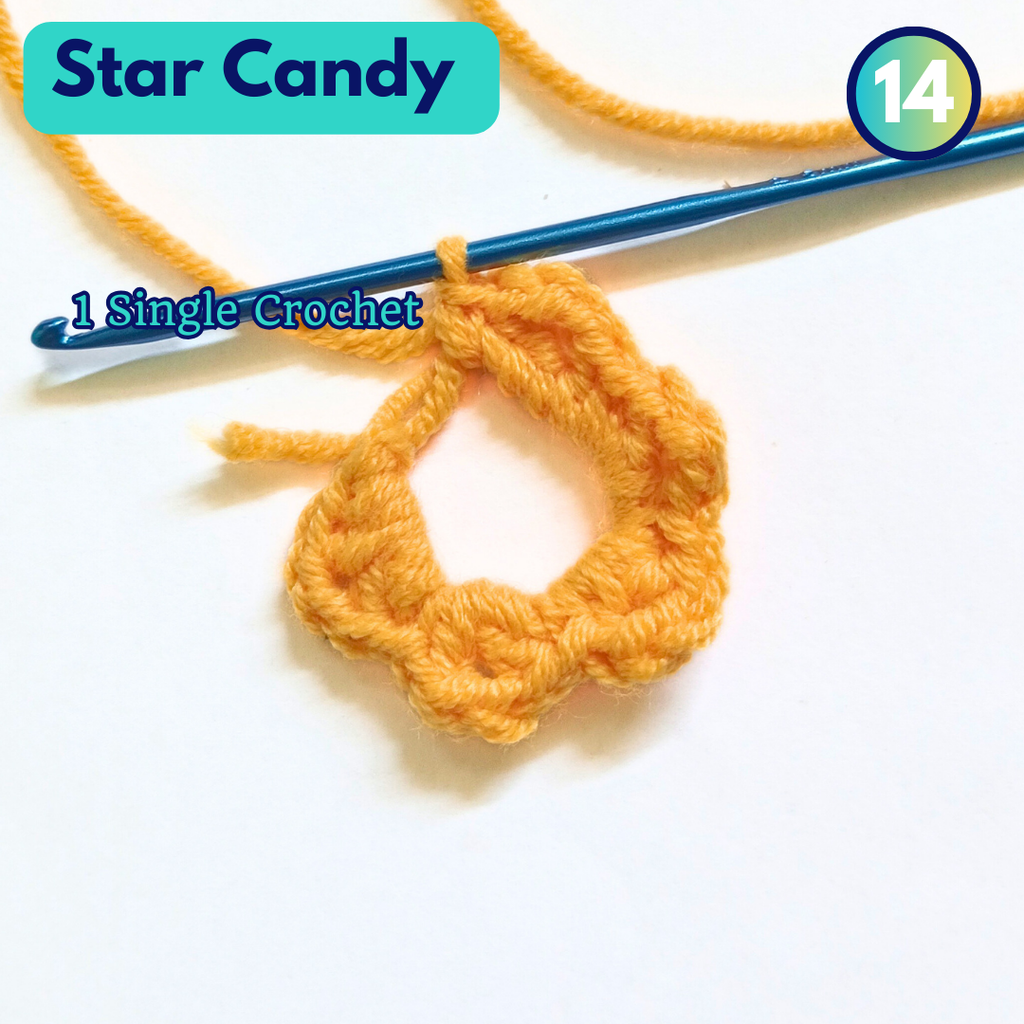
Slip Stitch to 1st SC of the round.
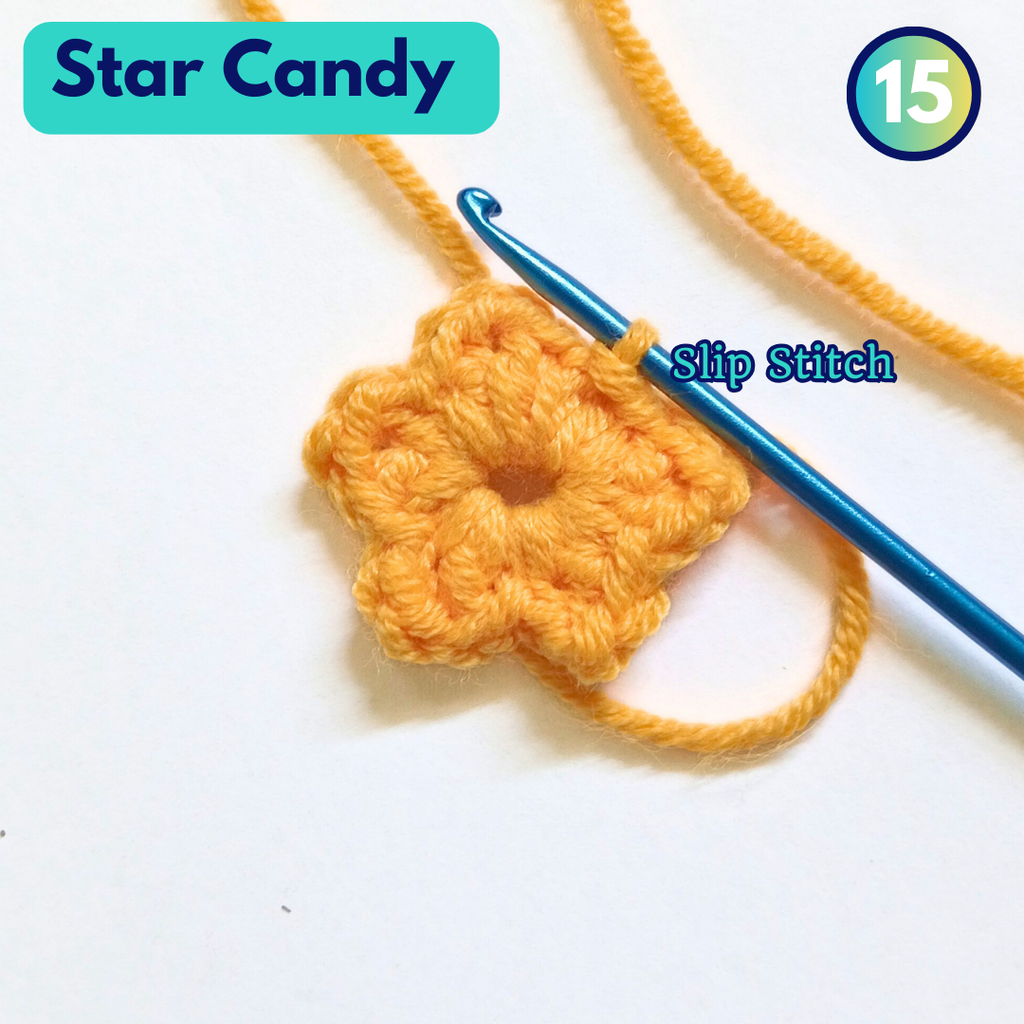
Pull the yarn tail to close the circle completely
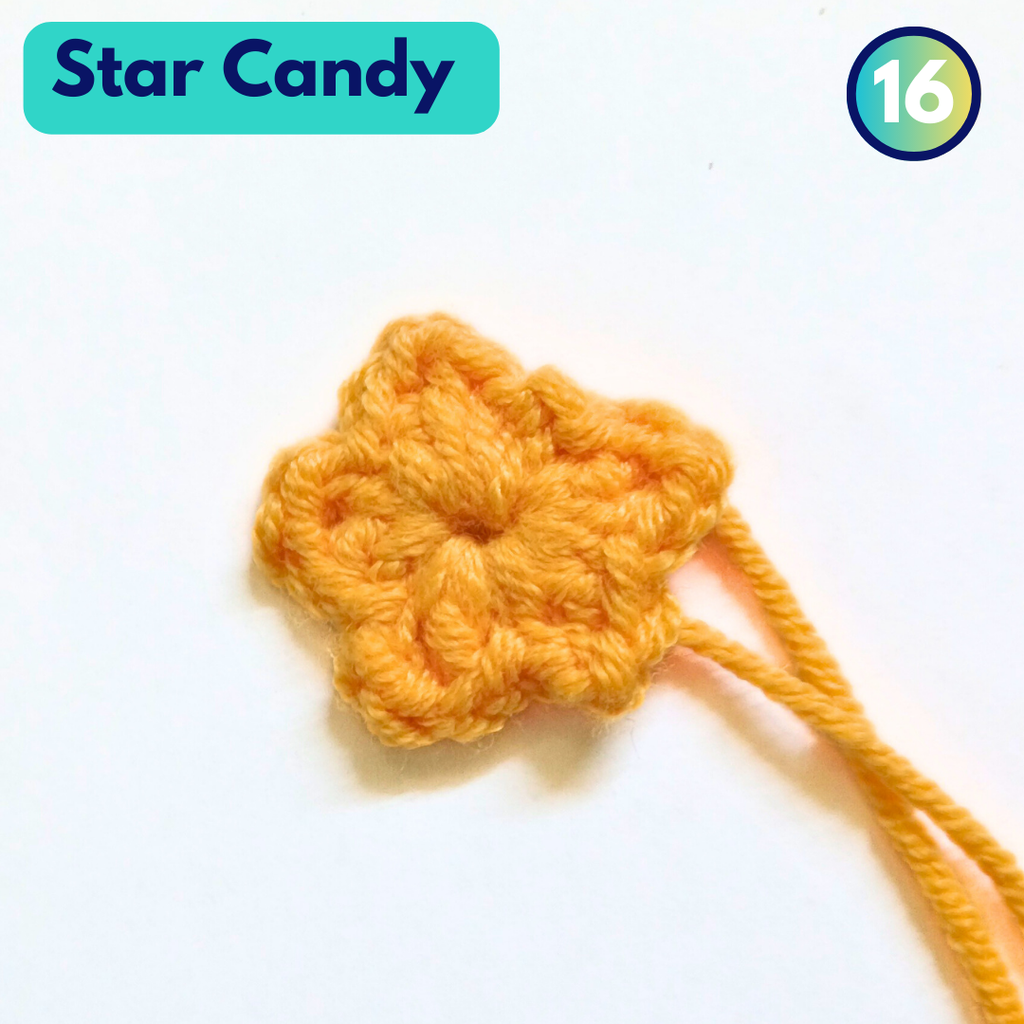
Use the tails to sew/attach to the base
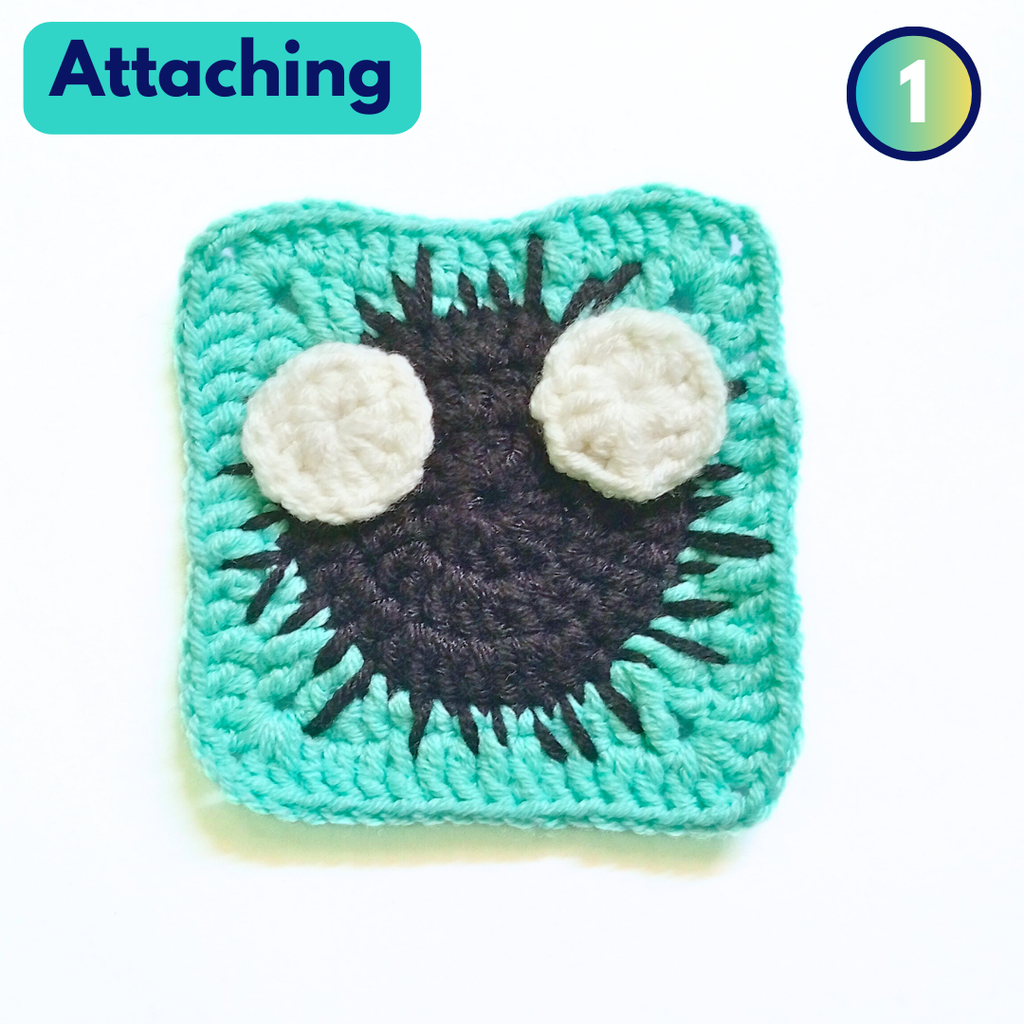
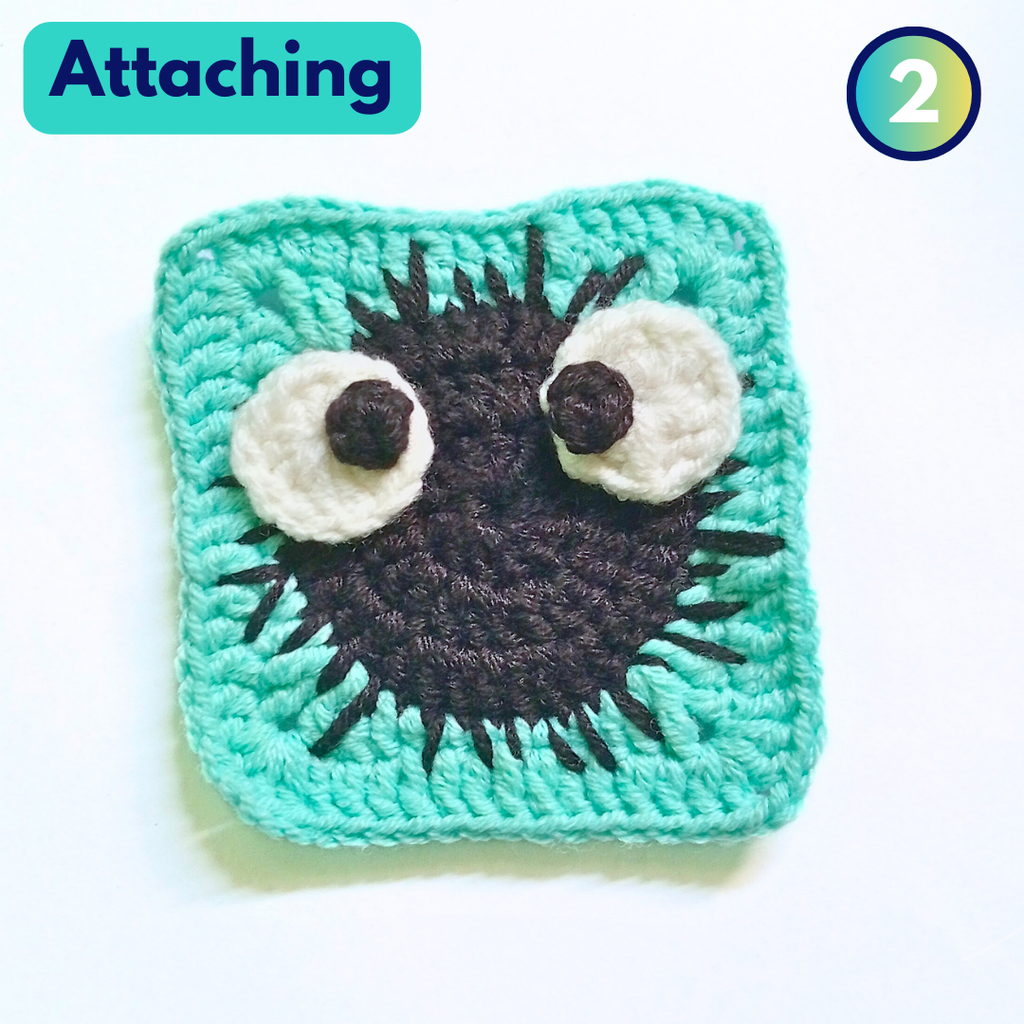
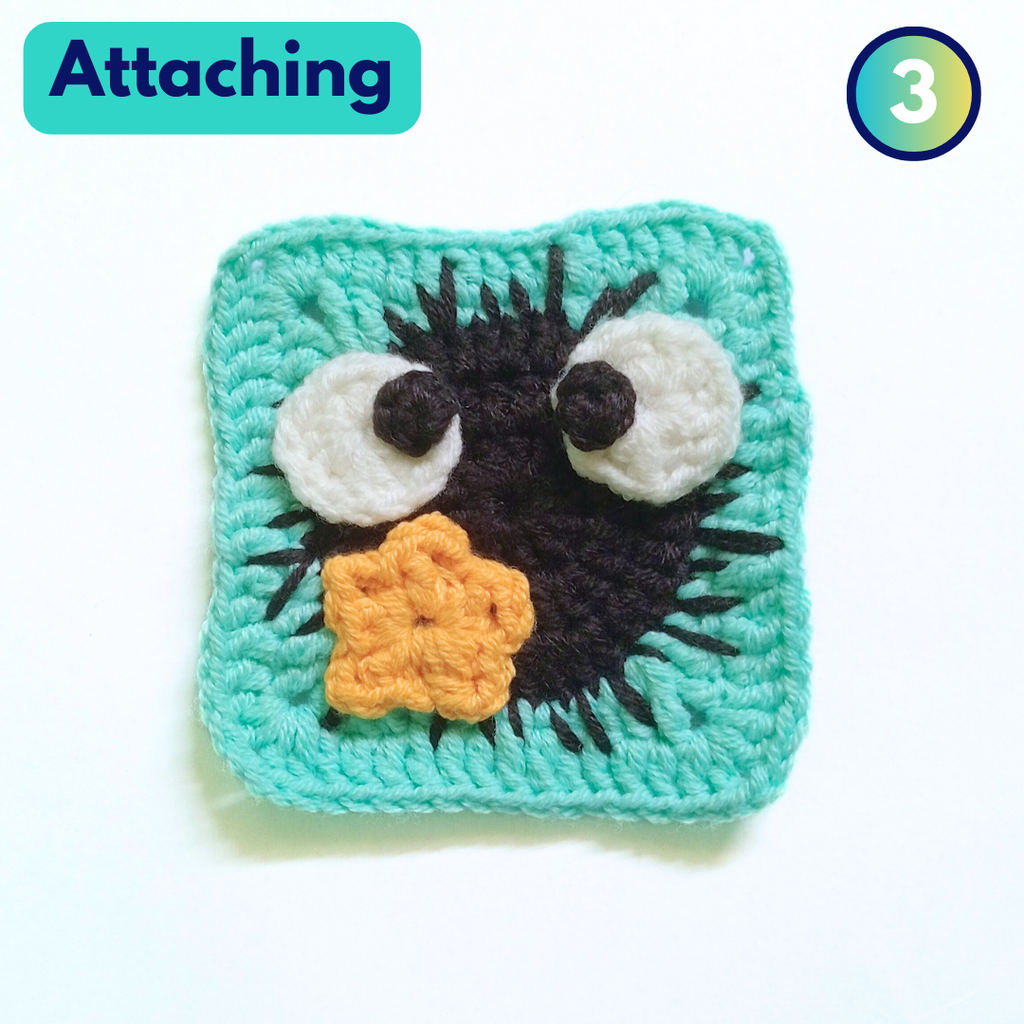
Step 3: Susuwatari | Attaching
Use the remaining yarn from every parts to attach them on to the base (square). You can use a tapestry needle to help you, but you can also use your hook (I used my hook).
Step 4: Kaonashi | Base
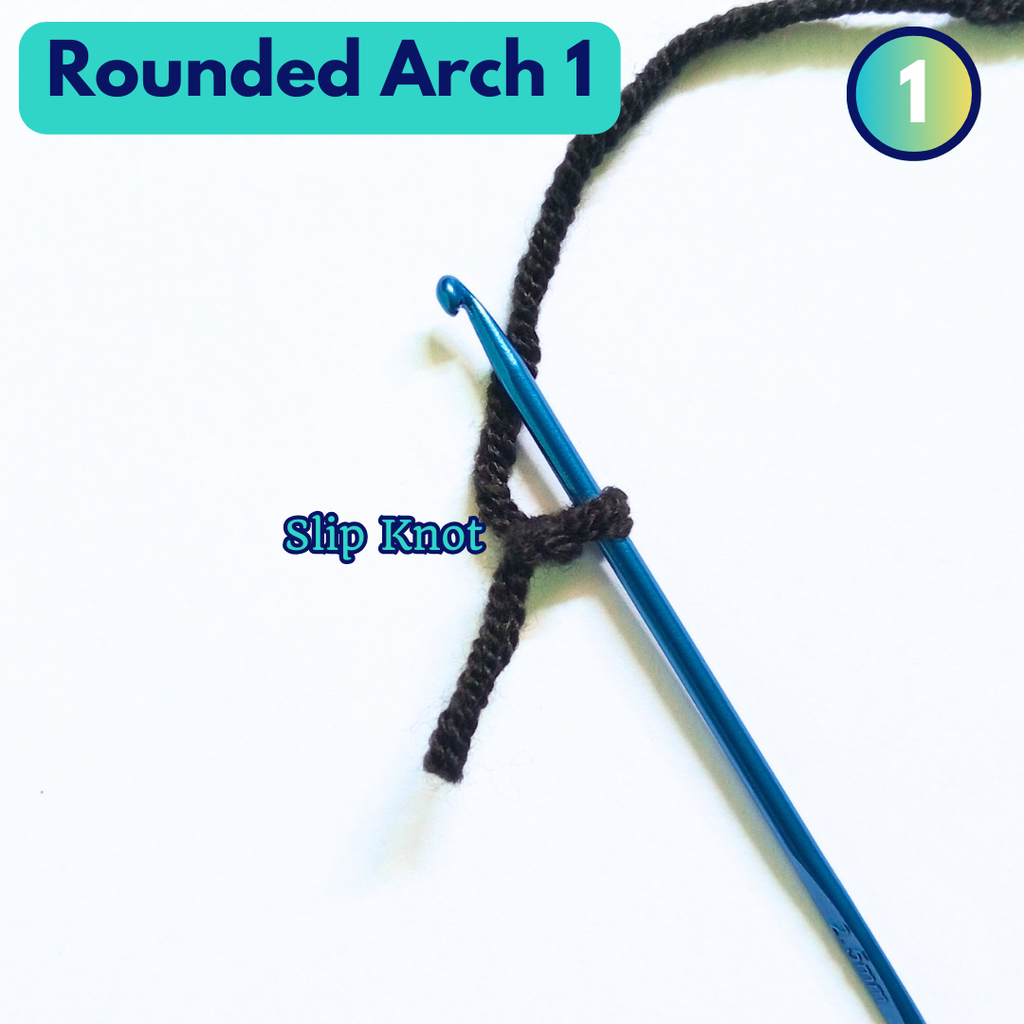
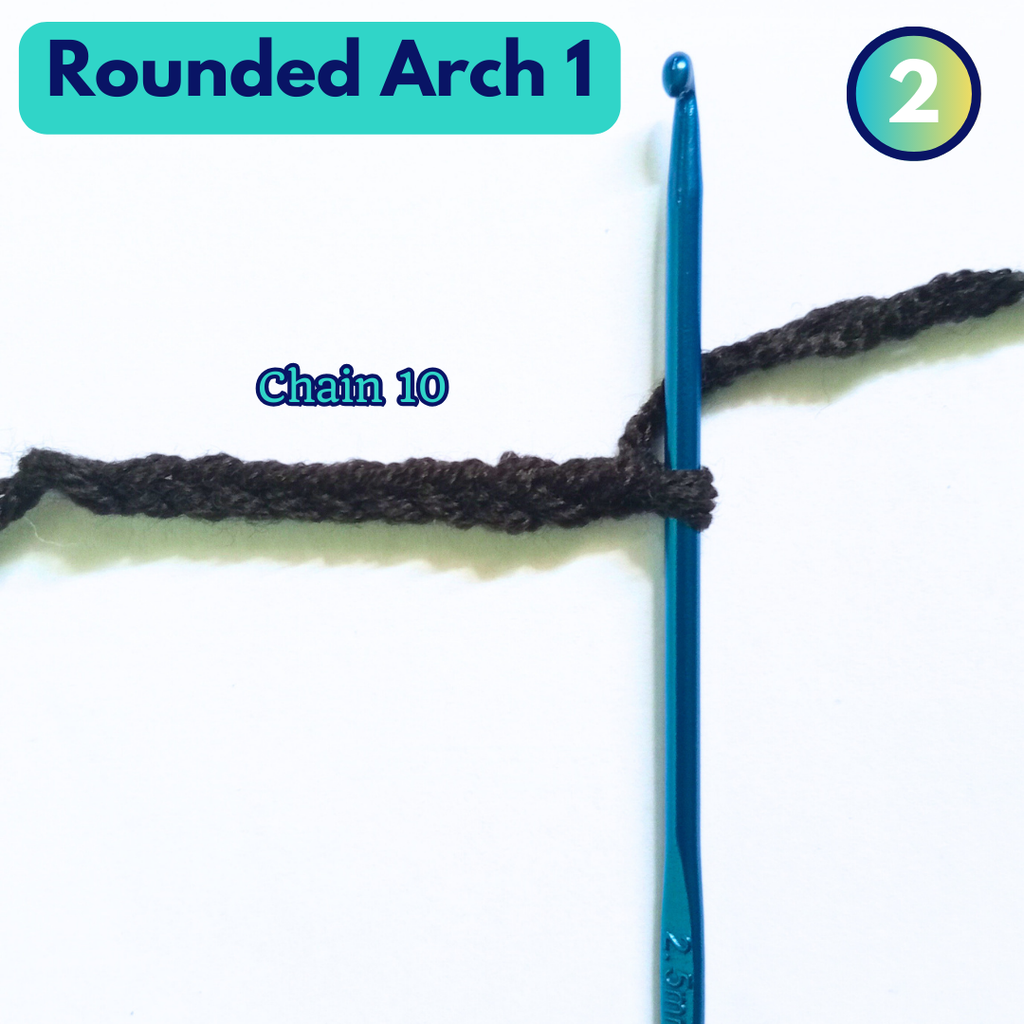
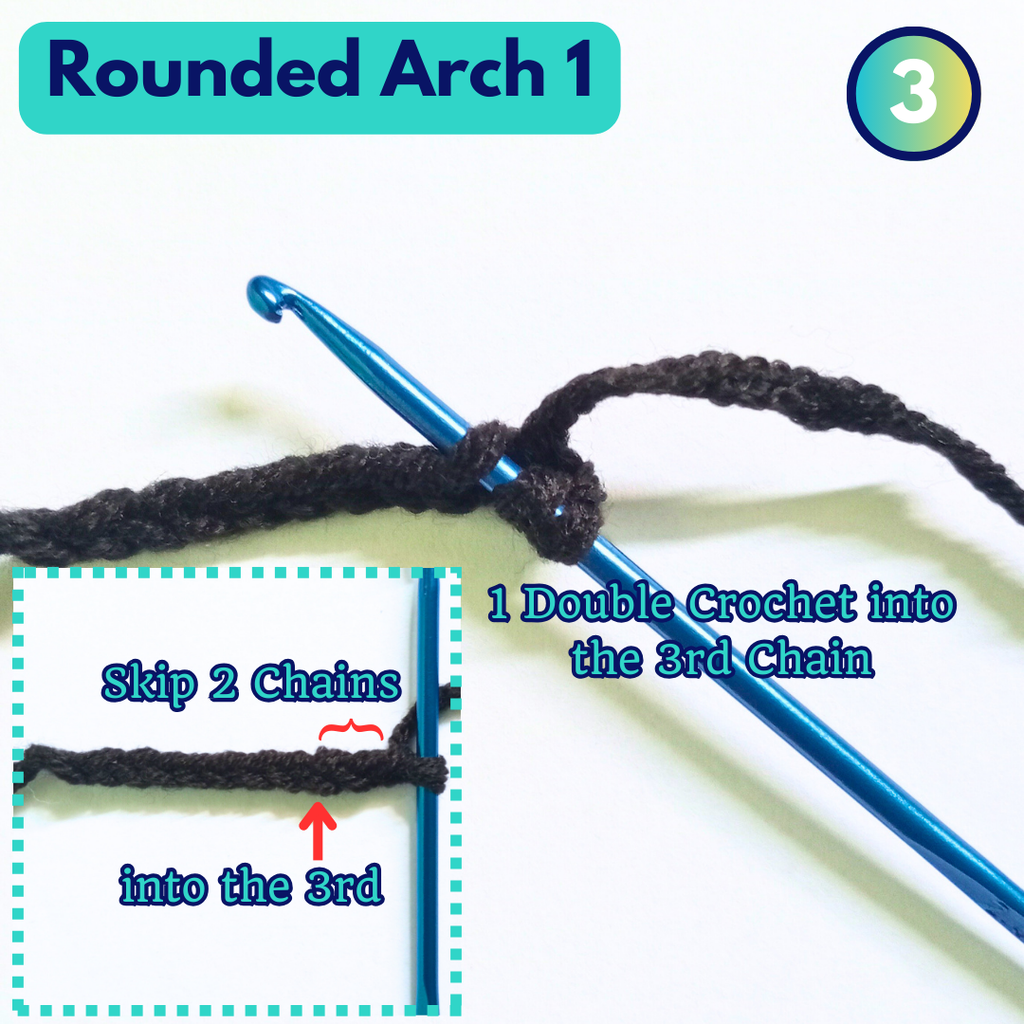
Rounded Arch 1
Make a Slip Knot
Chain 10
Skip 2 chains, 1 Double Crochet into the third chain
1 Double Crochet into every remaining chain (8 DC in total)
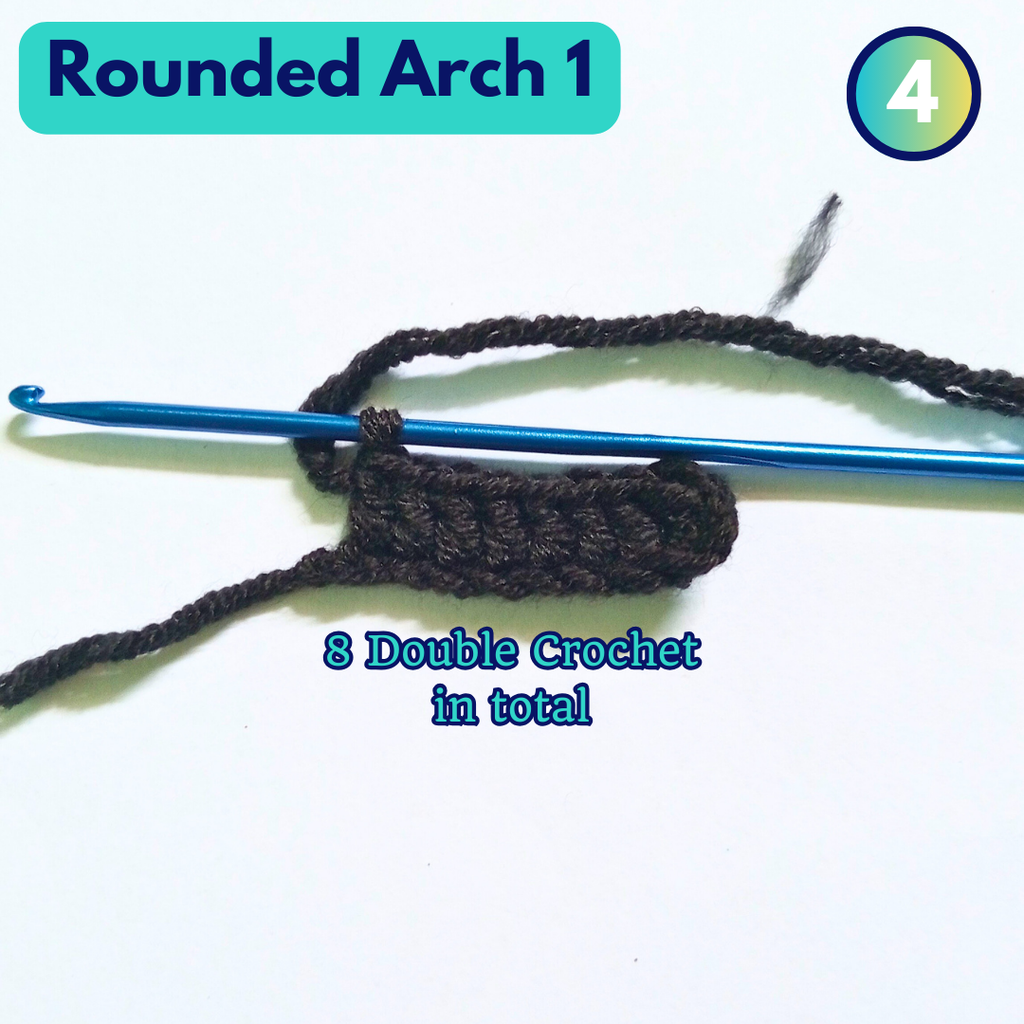
6 Double Crochet into the last chain (near the slip knot)
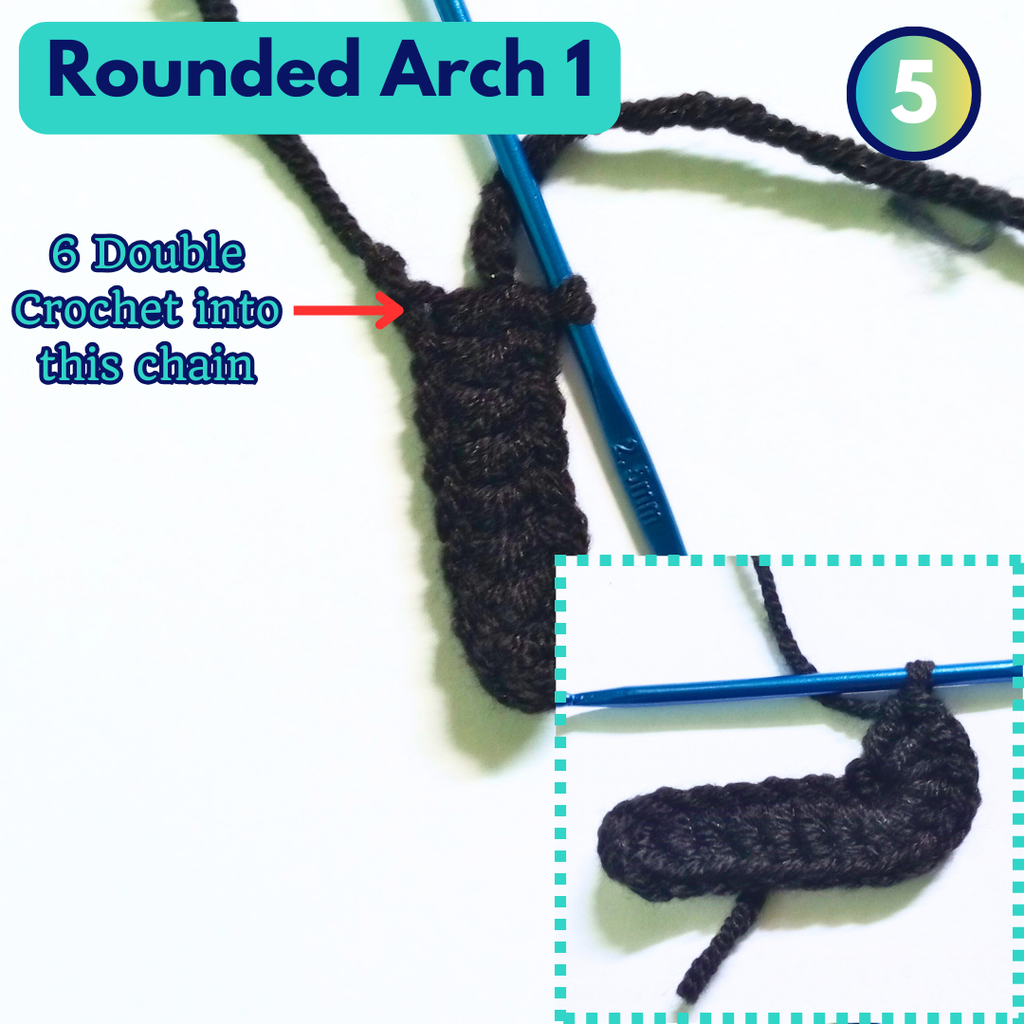
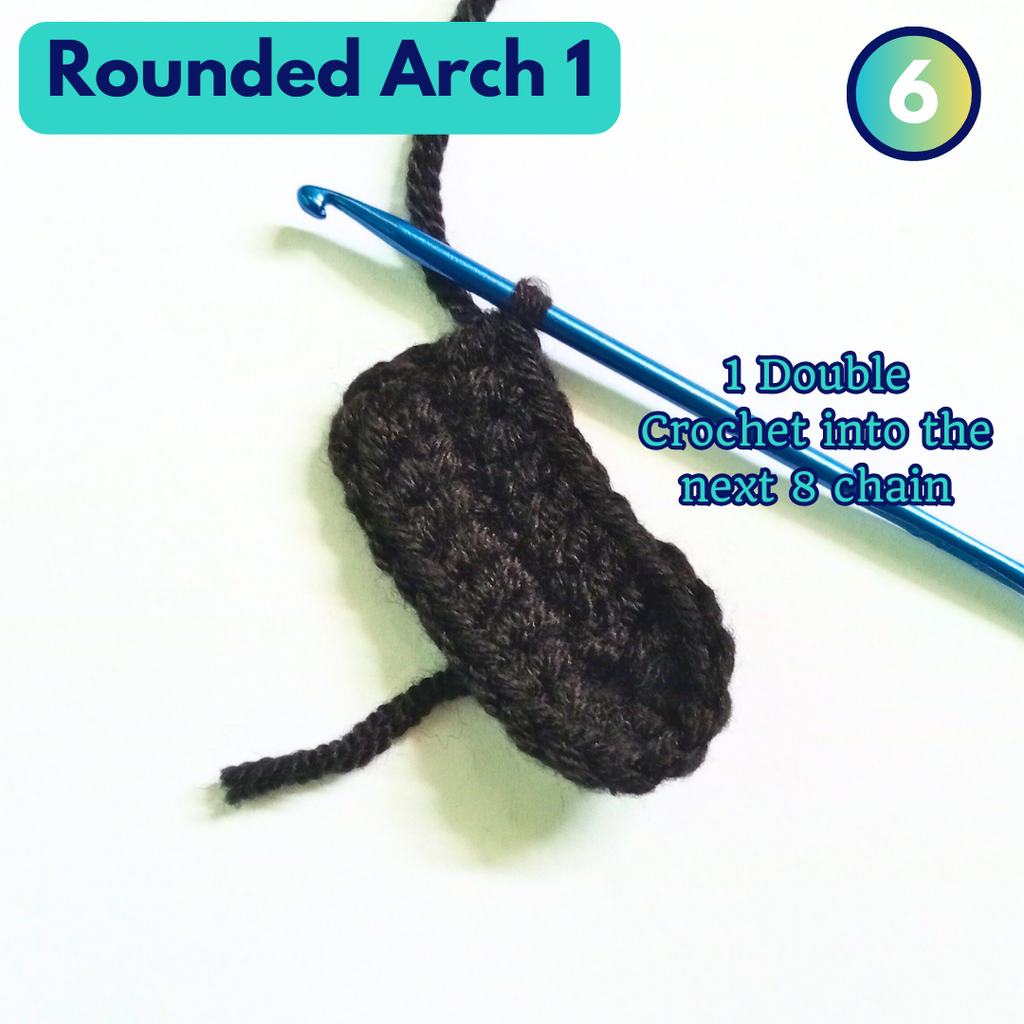
1 Double Crochet into every remaining Stitch (8 DC in total)
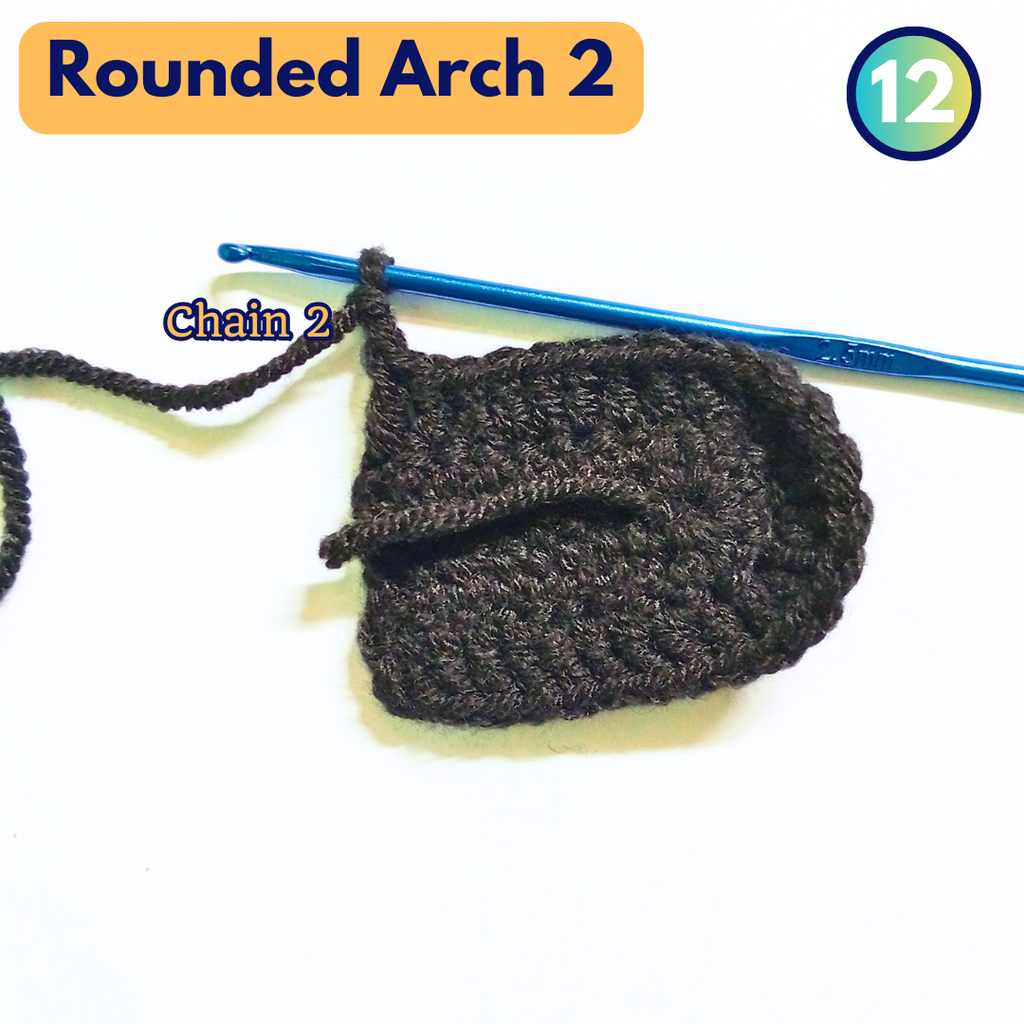
Chain 2
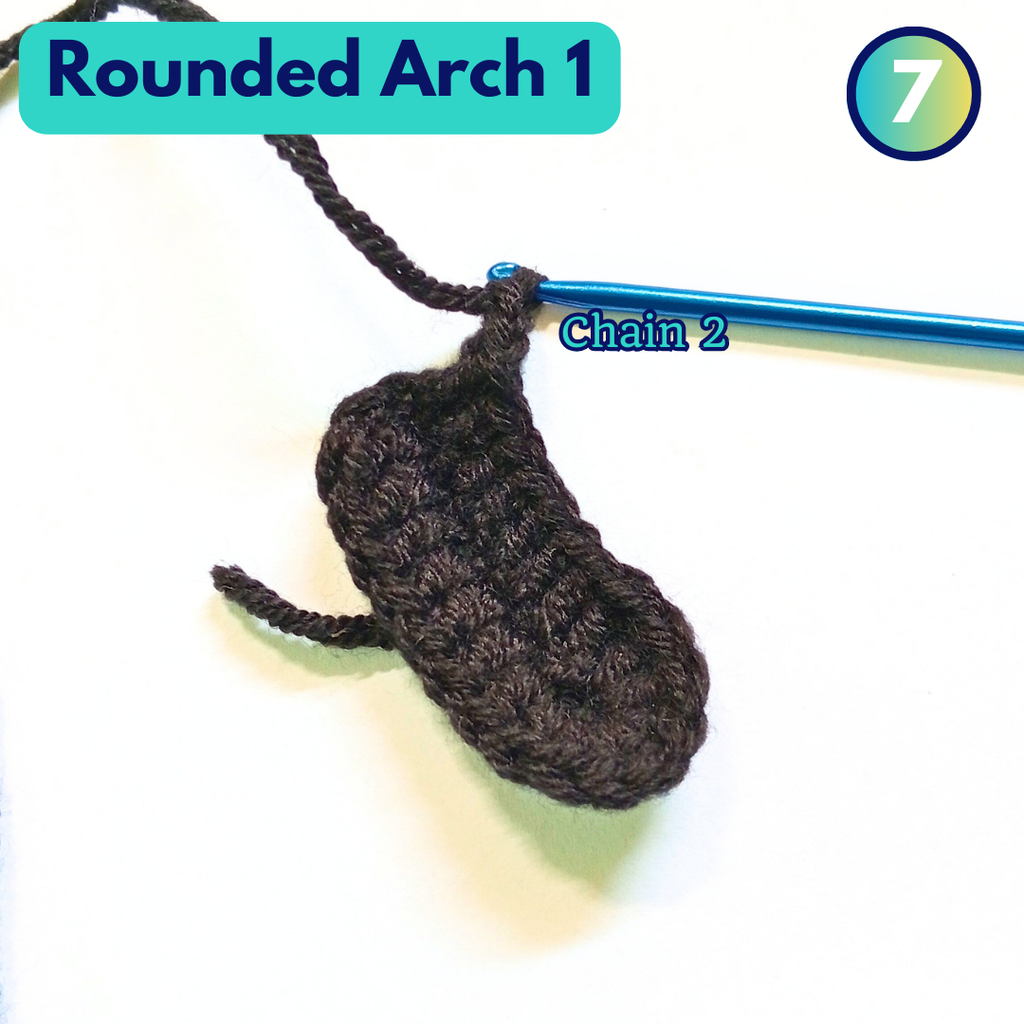
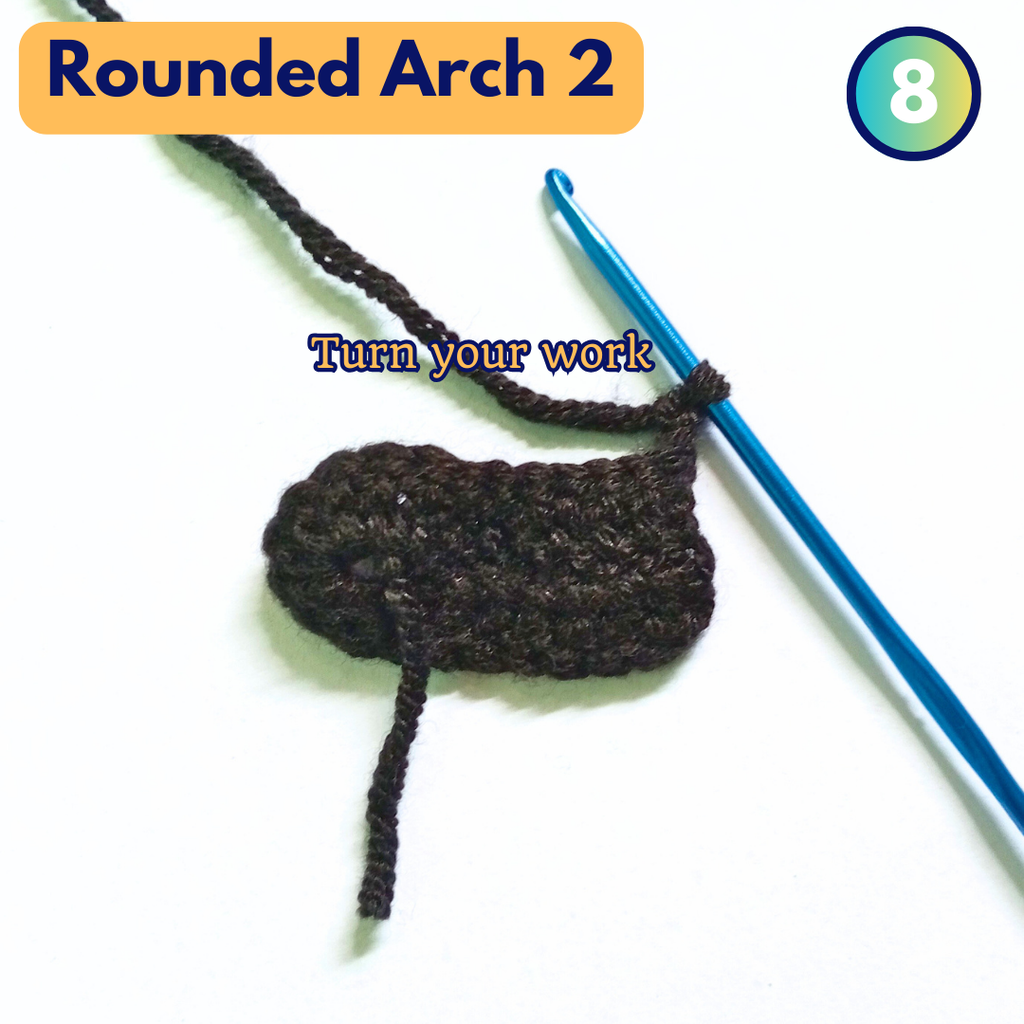
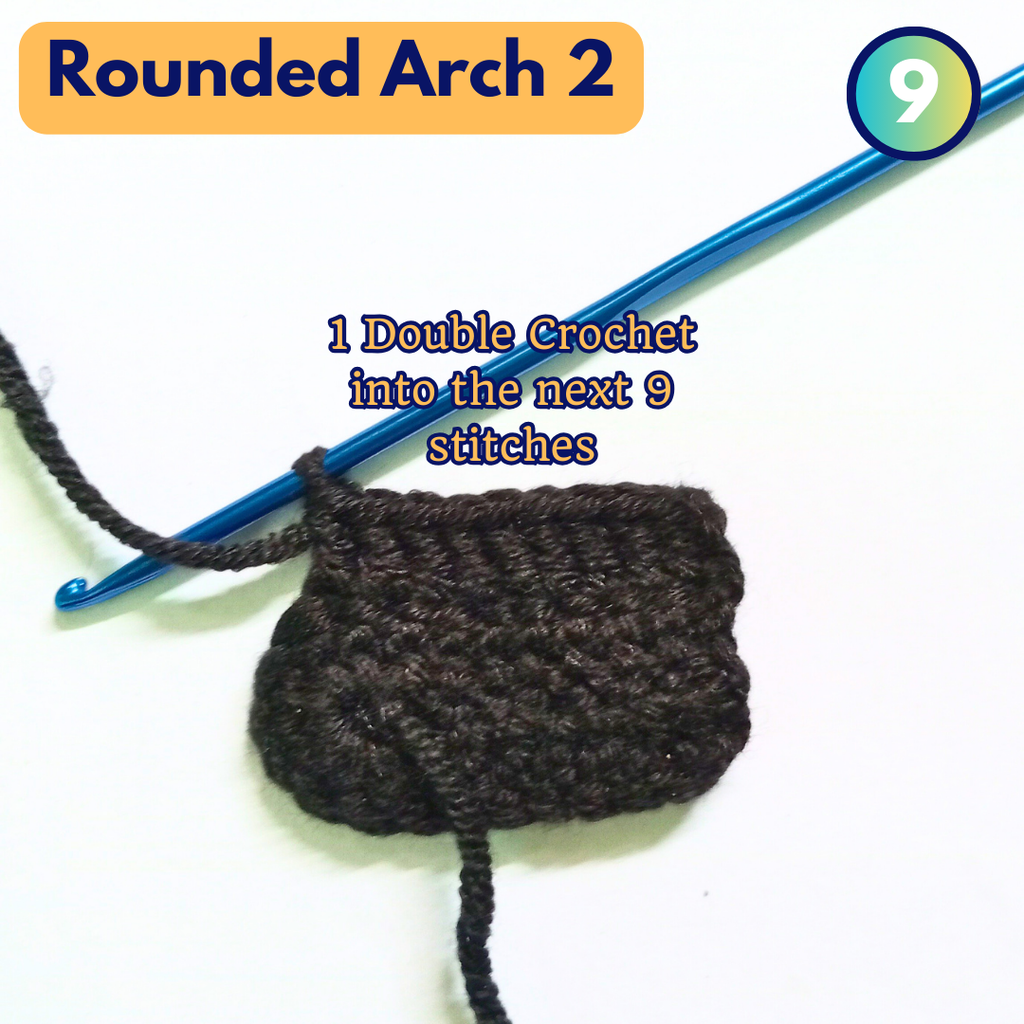
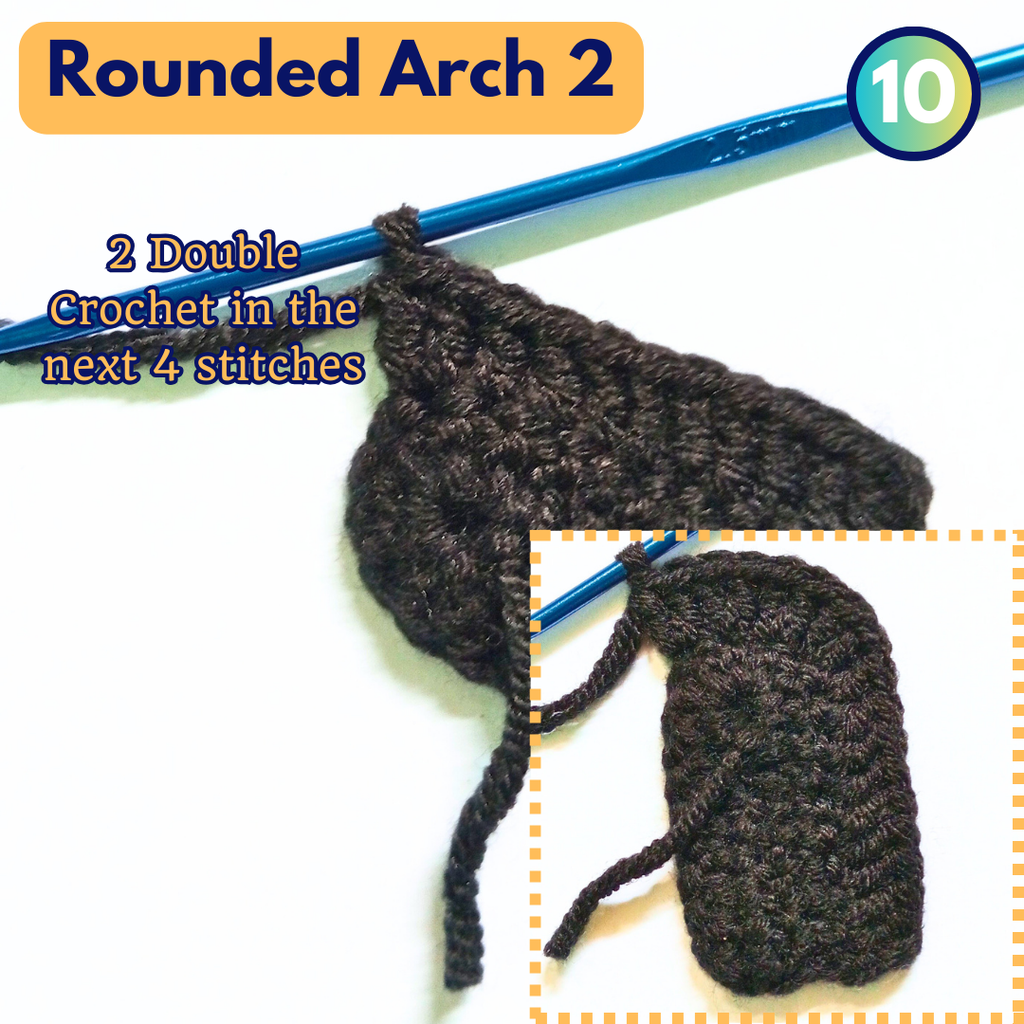
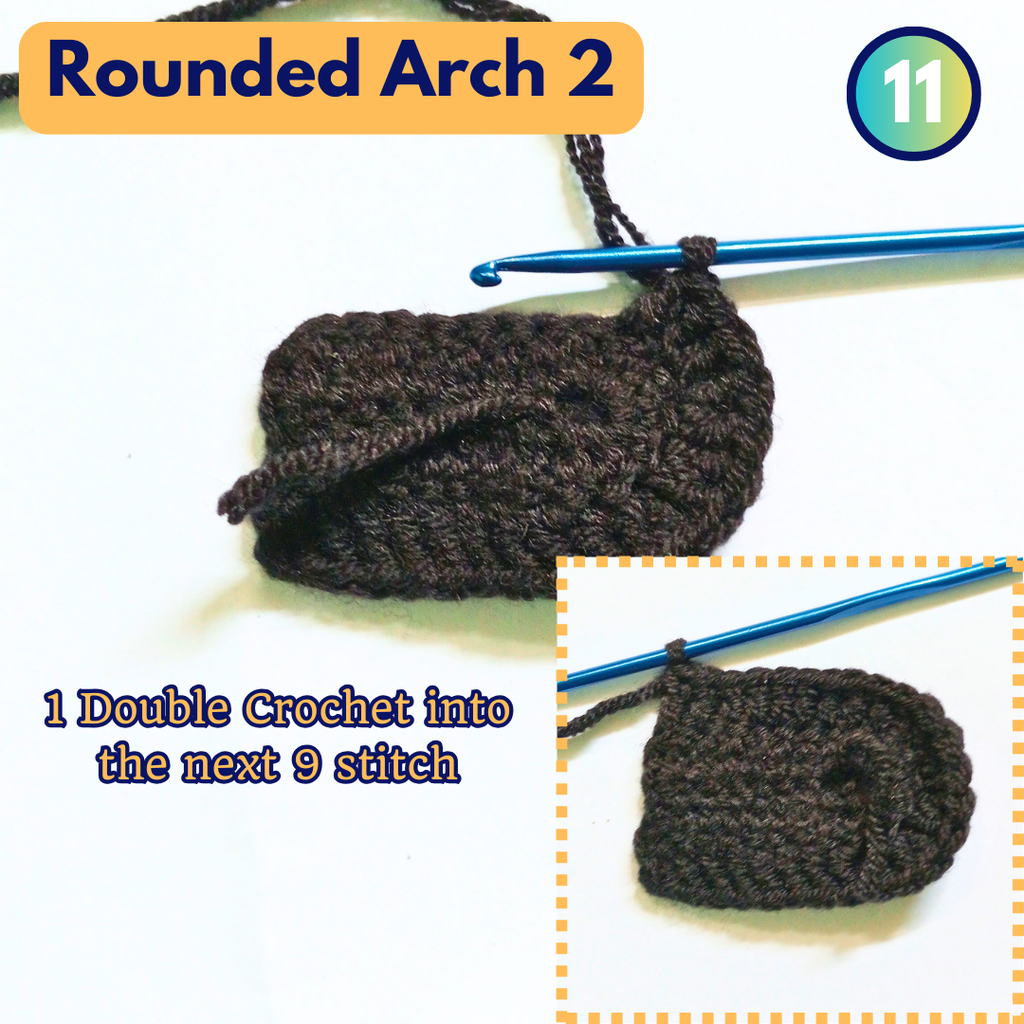
Rounded Arch 2
Turn your work
1 Double Crochet into the next 9 stitches
2 Double Crochet in the next 4 stitches
1 Double Crochet into the next 9 stitches
Chain 2
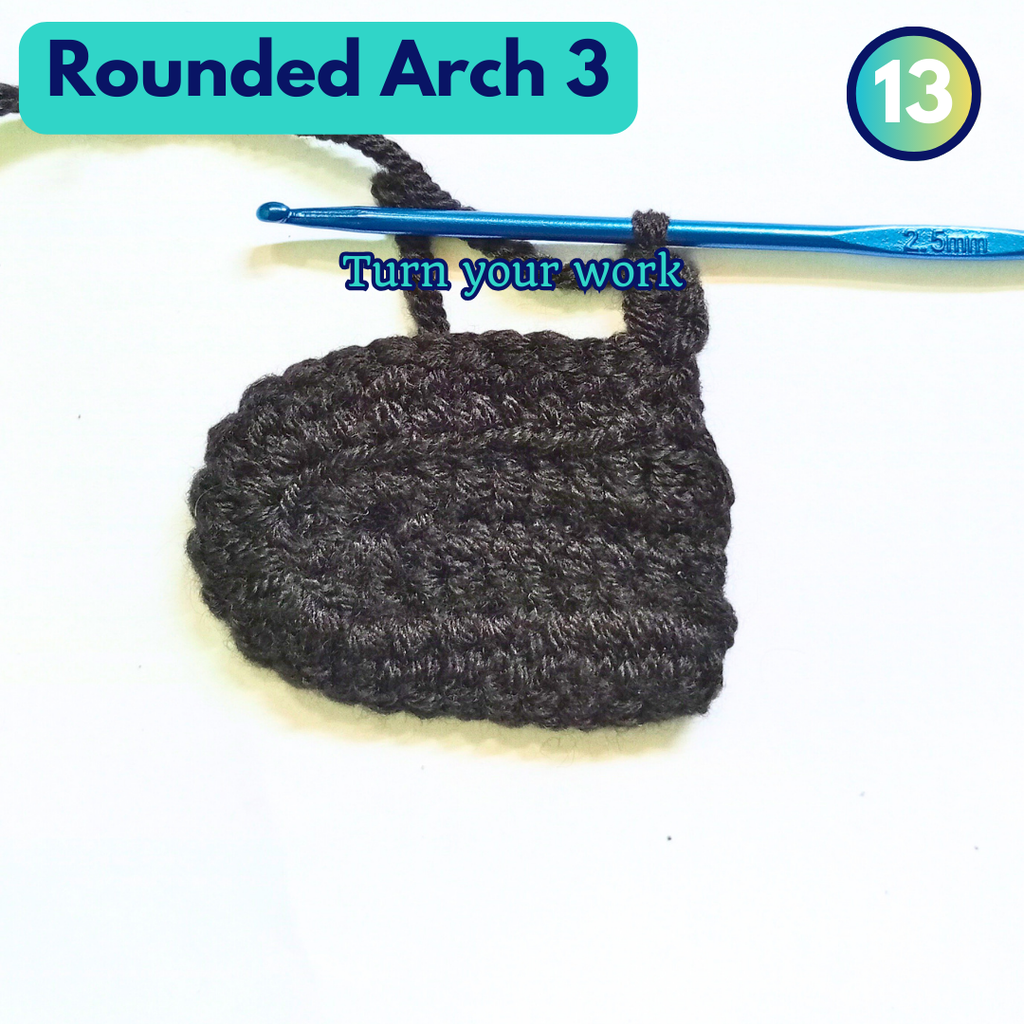
Rounded Arch 3
Turn your work
1 Double Crochet into the next 10 stitches
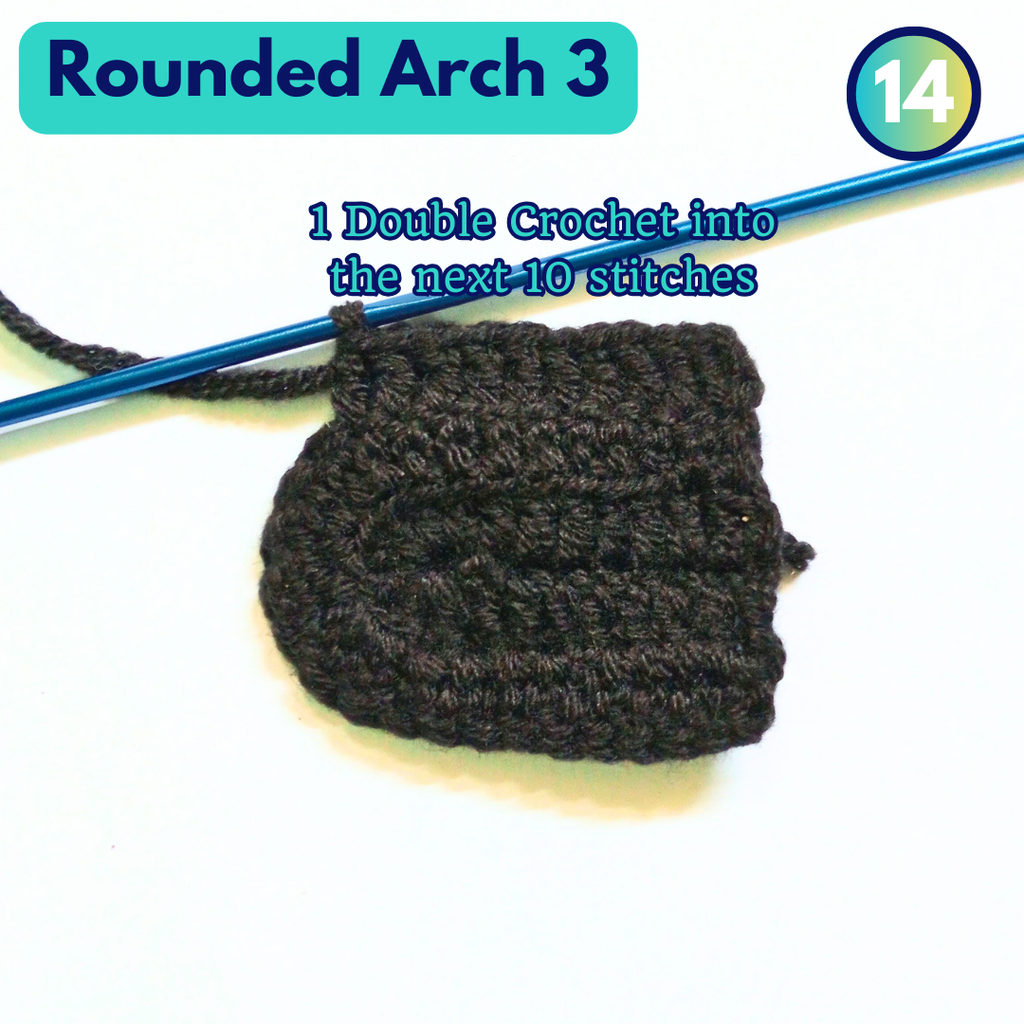
2 Double Crochet into the next 6 stitches
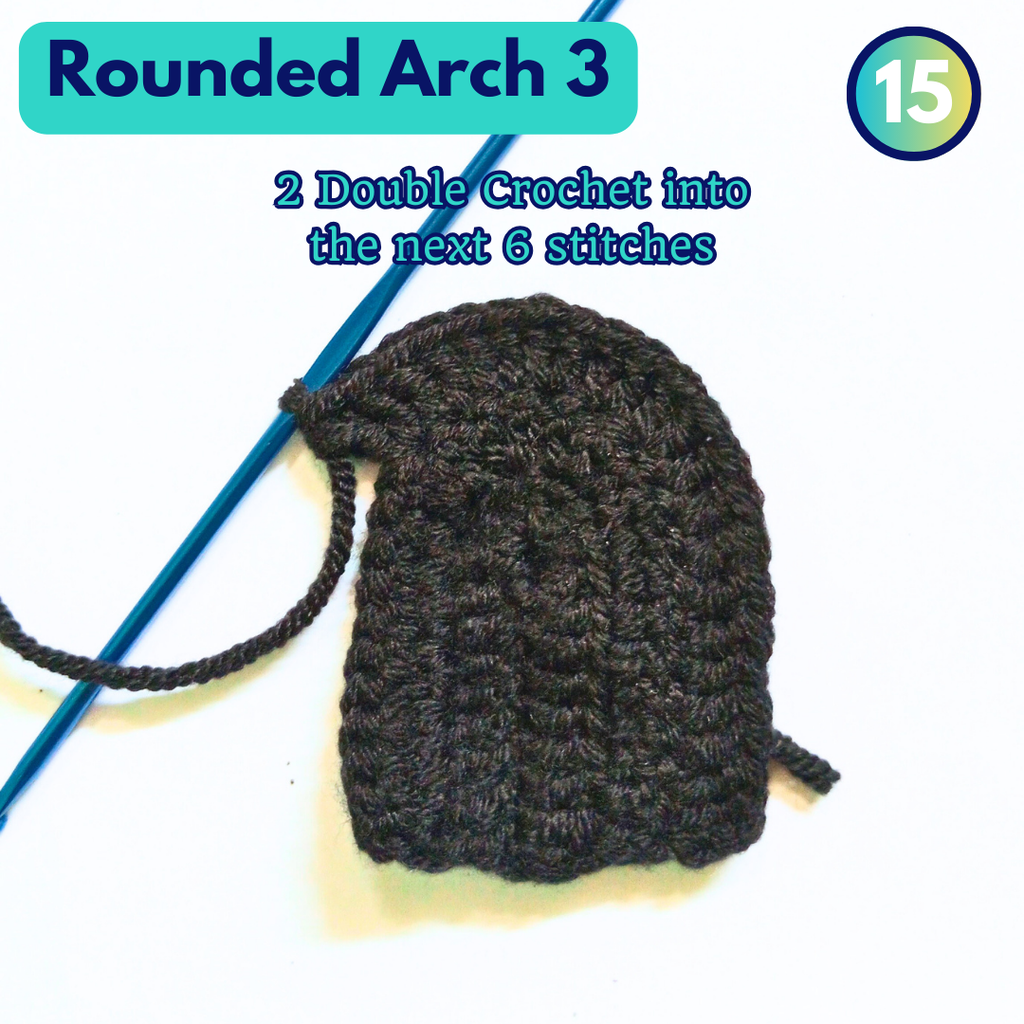
1 Double Crochet into the next 10 stitches
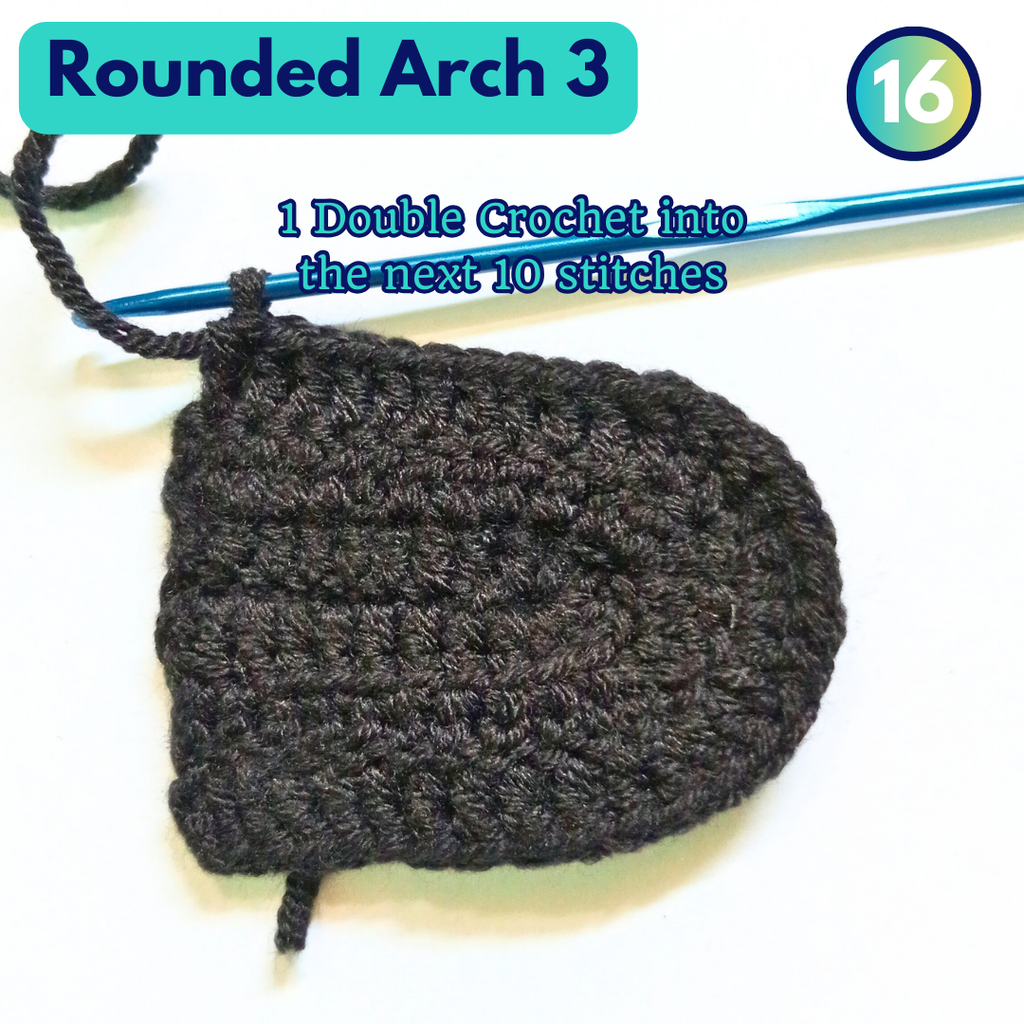
Fasten off
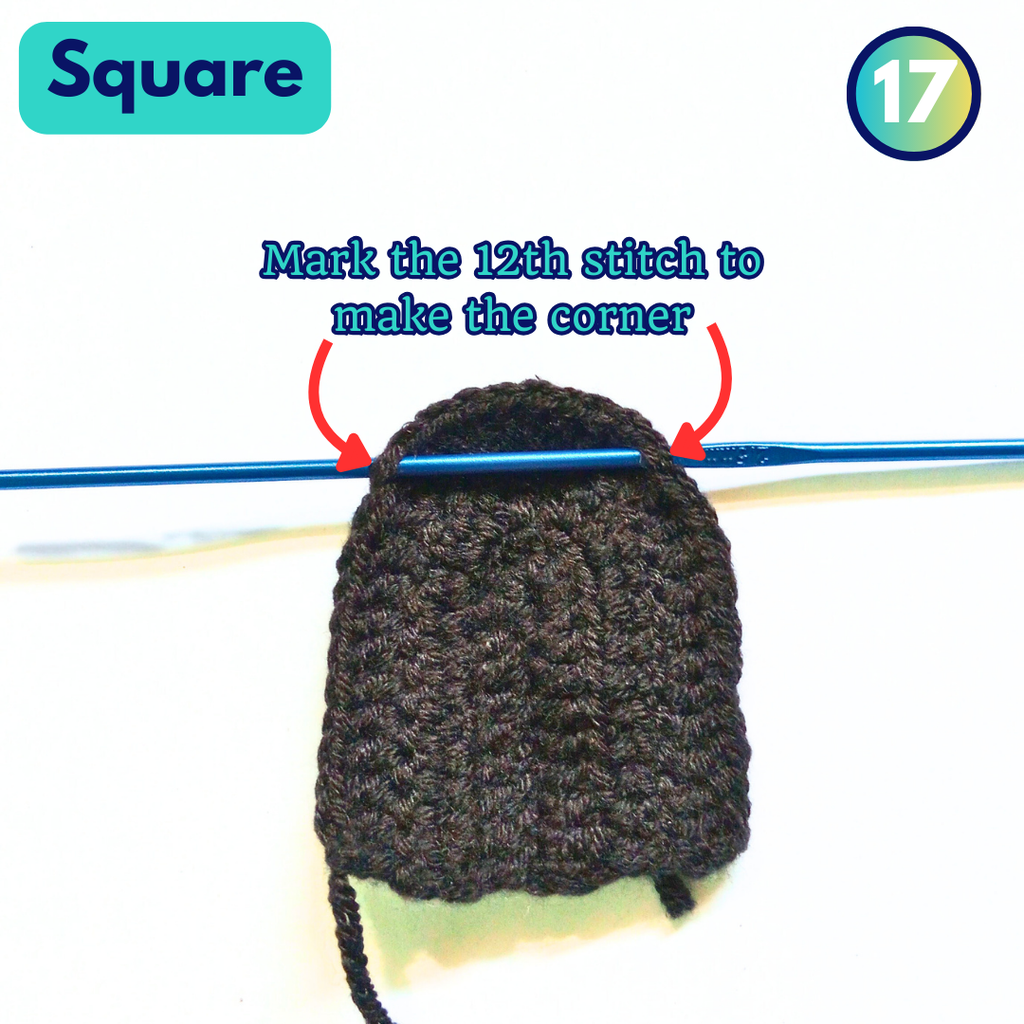
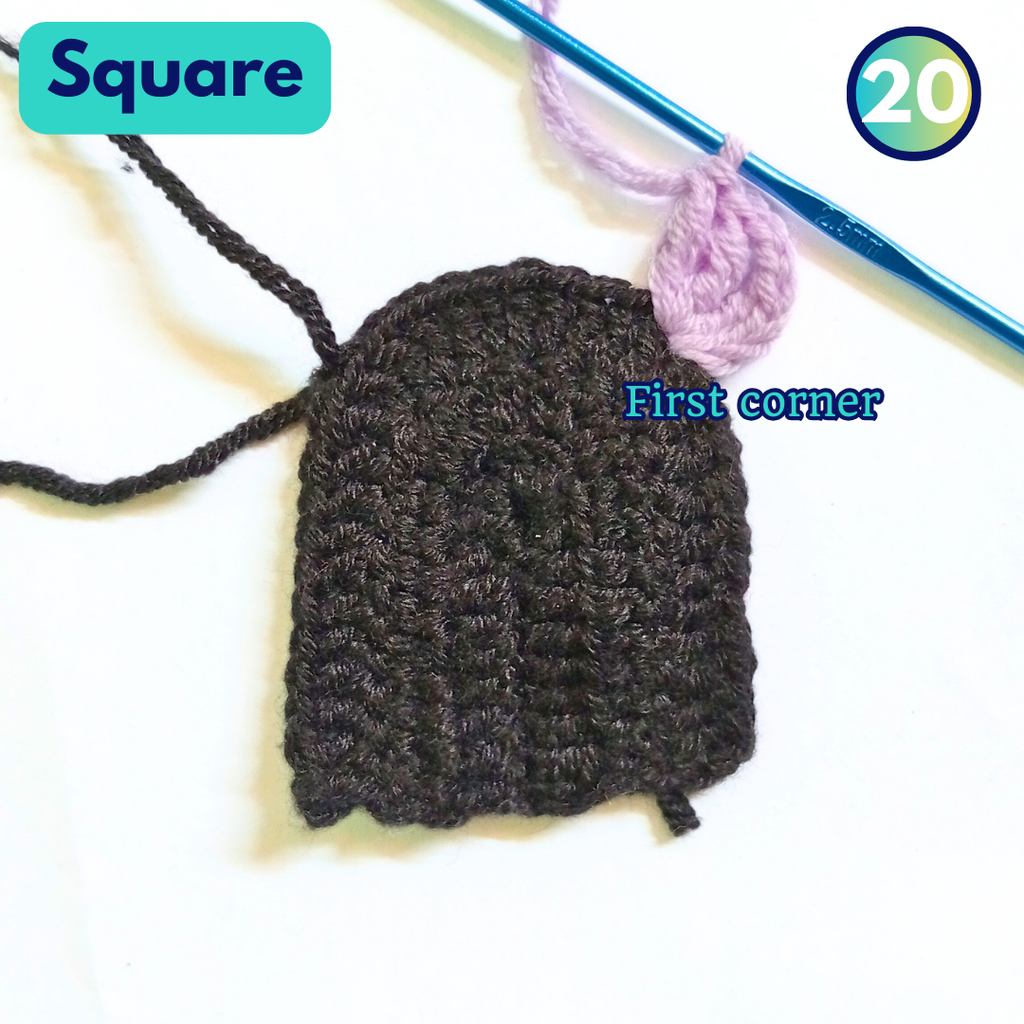
Square
Mark the 12th stitch to make the corner
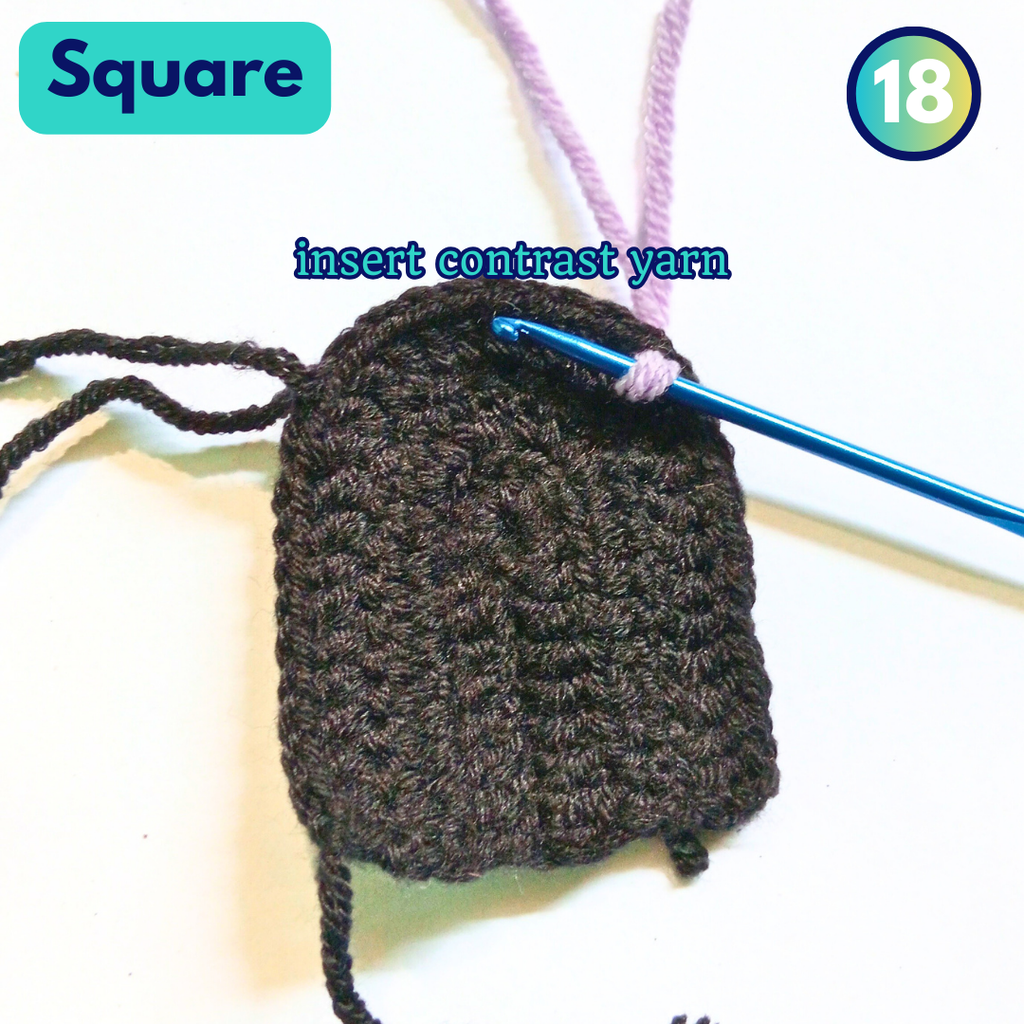
Insert contrast color yarn (I used lilac-colored yarn)
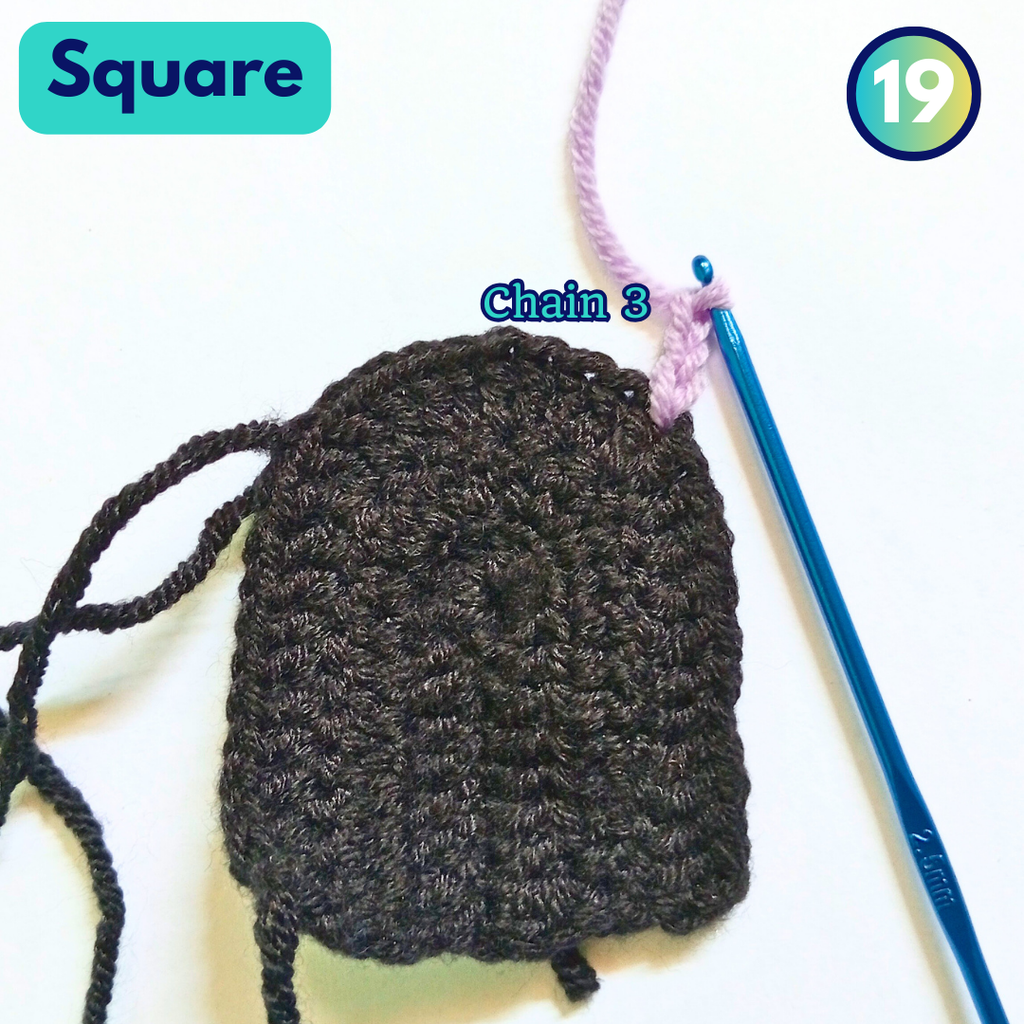
Chain 3, 1 Triple Crochet, Chain 2, 2 Triple Crochet in the same stitch – This is the first corner
1 Double Crochet
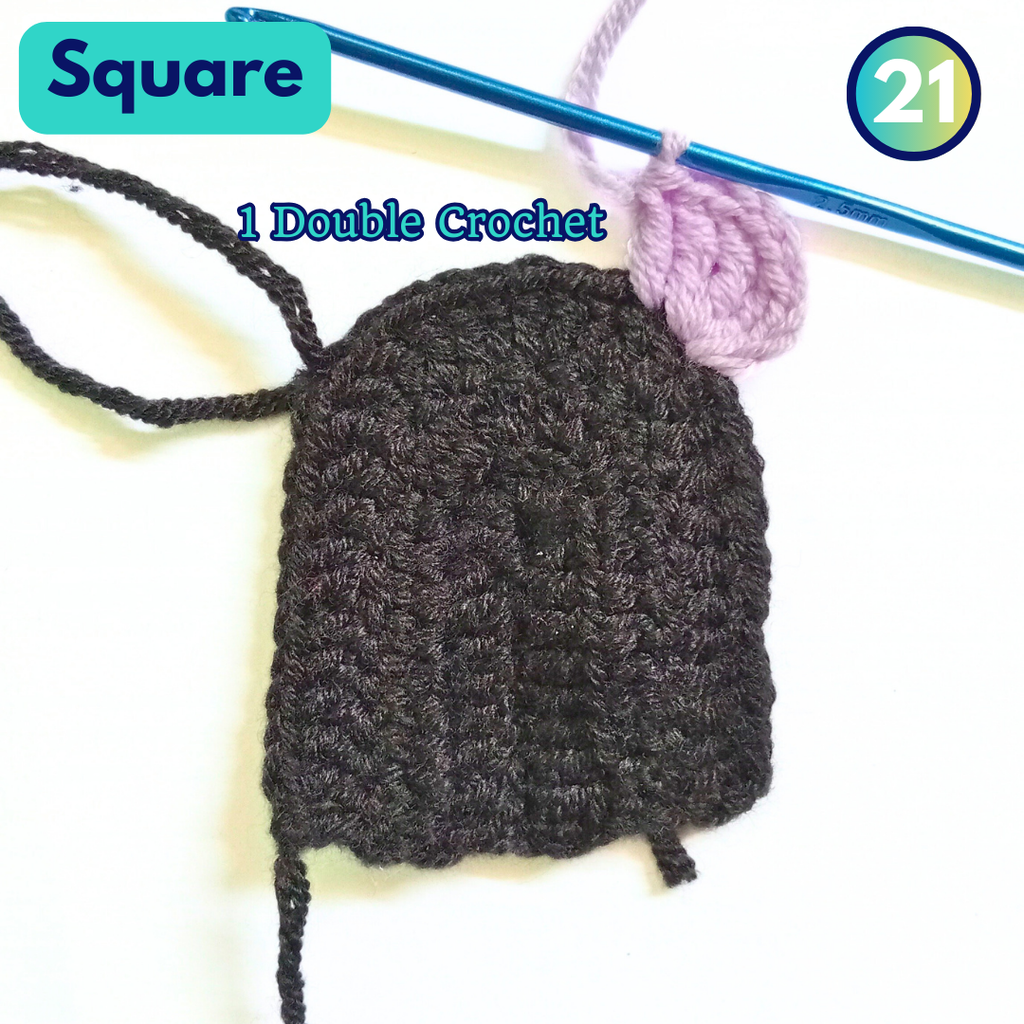
1 Half Double Crochet

1 Single Crochet into the next 4 stitches

1 Half Double Crochet

1 Double Crochet

Corner: 2 Triple Crochet, Chain 2, 2 Triple Crochet in the same stitch
1 Double Crochet to 10 stitches

Corner: 2 Triple Crochet, Chain 2, 2 Triple Crochet in the same stitch
1 Double Crochet into the next 10 stitches
Repeat Corner
After the rectangle is formed, you will notice that the shape is a bit taller. To make it square, I added Half Double Crochet in every stitch on the right and left sides.


Step 5: Kaonashi | Mask
Round 1
Slip knot

Chain 2

In the 2nd Chain from your hook, 6 Single Crochet

Round 2
Go to 1st Single Crochet, make 3 Single Crochet in that Chain space

2 Single Crochet into the next stitch

1 Single Crochet into the next stitch

3 Single Crochet into the next stitch

2 Single Crochet into the next stitch

1 Single Crochet into the next stitch
Round 3
1 Single Crochet
2 Single Crochet into the next 3 stitches (increase)

1 Single Crochet into the next 3 stitches
2 Single Crochet into the next 3 stitches
1 Single Crochet into the next 2 stitches
Round 4
1 Single Crochet into 2 stitches
2 Single Crochet into the next stitch (increase) [pict. 13]

1 Single Crochet
2 Single Crochet
1 Single Crochet
2 Single Crochet
1 Single Crochet into the next 4 stitches [pict. 14]

2 Single Crochet (increase)

1 Single Crochet
2 Single Crochet
1 Single Crochet
2 Single Crochet
1 Single Crochet into the next 2 stitches [pict. 16]

Round 5
1 Single Crochet into the next 3 stitches [pict. 17]

inc: 2 Single Crochet

1 Single Crochet
2 Single Crochet
1 Single Crochet
2 Single Crochet
1 Single Crochet into the next 7 stitches [pict. 19]

inc: 2 Single Crochet

1 Single Crochet
2 Single Crochet
1 Single Crochet
2 Single Crochet
1 Single Crochet into the next 4 stitches [pict. 21]

Slip stitch

Step 6: Kaonashi | Attaching
To attach the mask, follow the previous Susuwatari attachment step. However, for the eyes and the marks, you can use your yarn and tapestry needle and do it manually.

✍️Final Thought on Studio Ghibli Crochet
And that’s a wrap! 🎉 As a fellow beginner in the world of crochet, creating Studio Ghibli Crochet granny squares has been such a rewarding journey. I hope you’ve enjoyed making your own little pieces of *Spirited Away* magic along with me. This Studio Ghibli Crochet project taught me that even simple stitches can turn into something truly special, and it’s a reminder that crochet is as much about the process as the final piece.
If you’re also new to crochet, remember—every stitch gets you closer to mastering your craft. Thank you for joining me on my very first crochet project and tutorial! I’m excited to see how these squares become part of your own unique creations. Until next time, happy crocheting! 🧶✨
Check another crochet project
This tutorial was posted on my instructables
Quinzy Varira | Instagram | TikTok | Blog